
Slow Cooker Recipes: Easy Meals, Less Effort!
Family-friendly dishes for busy people — quick prep, delicious results.
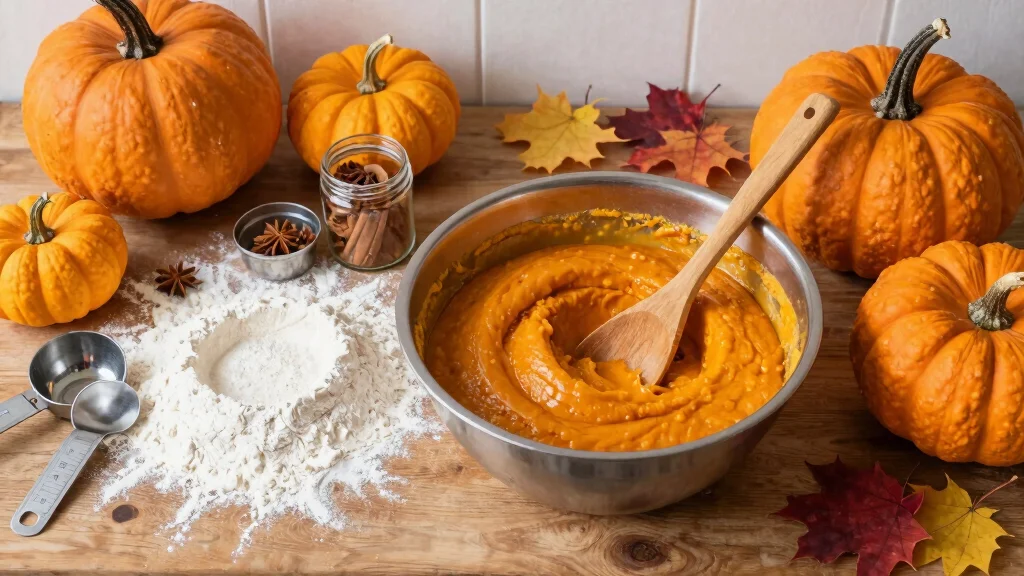
Grab yours for $4Baking is more than just a cooking method; it’s a joyful experience that fills your home with warmth and delicious aromas. I created this post because I know how satisfying it can be to whip up something tasty from scratch, especially when you have a craving for sweet treats or comforting baked goods. If you’re looking for simple and delightful ways to use flour and baking powder, you’re in the right spot.
This guide is for anyone who loves to bake but may want to explore gluten-free options without sacrificing flavor or texture. Whether you’re gluten-free yourself or just curious about alternative baking methods, these recipes are designed to be accessible and enjoyable for everyone. With 17 exciting recipes, you’ll discover how versatile baking can be, using unique flours like almond, coconut, and chickpea. Each recipe promises easy steps, so even novice bakers can shine in the kitchen.
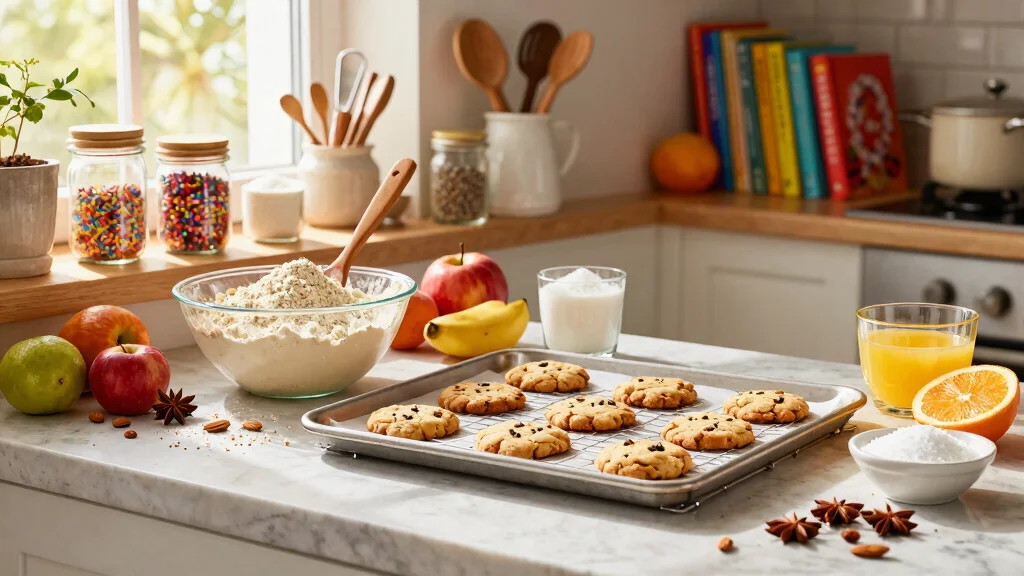
Get ready to embark on a baking adventure filled with creativity and deliciousness! From chewy cookies to fluffy pancakes, you’ll find recipes that not only satisfy your cravings but also introduce you to new ingredients and techniques. So, grab your apron and preheat that oven; let’s dive into the world of flour and baking powder recipes that you can feel good about enjoying!
Key Takeaways
– Explore Gluten-Free Options: Discover how different flours like almond and coconut can replace traditional wheat flour in your baking.
– Easy-to-Follow Recipes: Each recipe is crafted to be straightforward, making them perfect for bakers of all skill levels.
– Variety of Delicious Treats: Enjoy a range of baked goods from cookies and pancakes to pizza crusts and donuts that cater to different tastes.
– Healthy Alternatives: Many of these recipes focus on using alternative flours, promoting healthier options for your homemade baked goods.
– Inspiration for Creativity: These recipes encourage you to experiment with different flavors and ingredients, making baking a fun and inventive process.


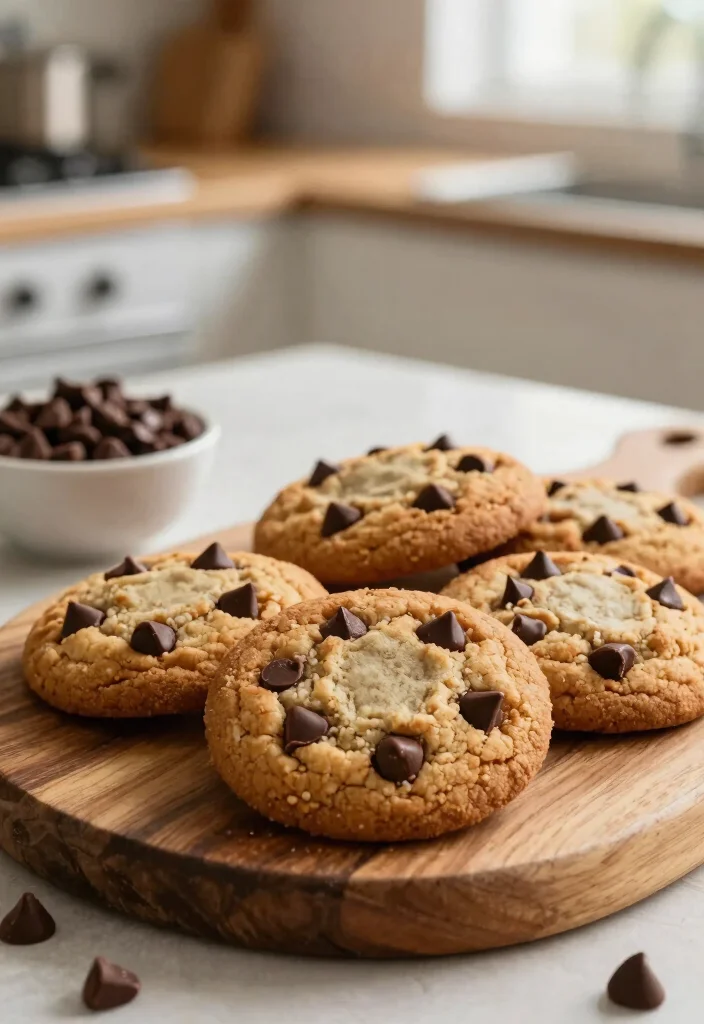
1. Almond Flour Chocolate Chip Cookies
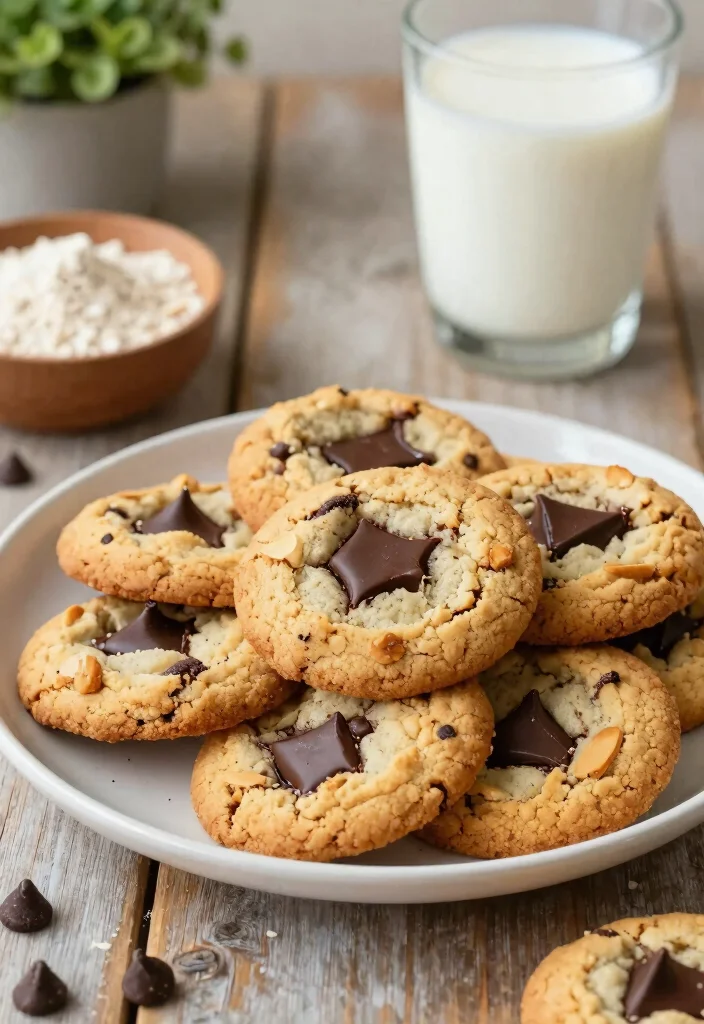
Are you craving a warm, sweet treat that hits the spot? These almond flour chocolate chip cookies are the answer! They bring together a delightful nuttiness and a soft, chewy texture, making them perfect for any occasion, from an afternoon snack to a late-night indulgence.
With their gluten-free goodness, these cookies are not only tasty but also provide a hint of protein and healthy fats thanks to almond flour. Plus, they are incredibly easy to prepare, so you can whip up a batch in no time!
Ingredients:
– 2 cups almond flour
– 1/2 tsp baking powder
– 1/4 tsp salt
– 1/4 cup coconut oil, melted
– 1/4 cup maple syrup
– 1 tsp vanilla extract
– 1/2 cup chocolate chips
Instructions:
1. Preheat your oven to 350°F (175°C) and prepare a baking sheet with parchment paper.
2. In a mixing bowl, combine almond flour, baking powder, and salt.
3. In another bowl, whisk together melted coconut oil, maple syrup, and vanilla extract until smooth.
4. Gradually mix the dry ingredients into the wet ingredients until well combined.
5. Gently fold in the chocolate chips.
6. Scoop tablespoon-sized portions onto the baking sheet, spacing them apart.
7. Bake for 10-12 minutes, until the edges are golden.
8. Let them cool on the baking sheet for 5 minutes before transferring to a wire rack.
– For added flavor, try a pinch of cinnamon.
– Store in an airtight container to keep them fresh.
FAQs:
– Can I use regular flour? No, these cookies are specifically designed for almond flour for the best texture.
– How can I store these? Keep them in a sealed container at room temperature or in the fridge for longer freshness.


2. Coconut Flour Pancakes

Looking for a fluffy breakfast that’s both delicious and easy? These coconut flour pancakes are just what you need! They’re delightfully light and airy, packed with coconut flavor, making them a fantastic choice for breakfast or brunch.
Quick to prepare, these pancakes are gluten-free and can be topped with anything from fresh fruit to a drizzle of syrup, ensuring a delightful start to your day.
Ingredients:
– 1/2 cup coconut flour
– 1 tsp baking powder
– 1/4 tsp salt
– 3 eggs
– 1/2 cup coconut milk
– 1 tbsp honey or maple syrup
Instructions:
1. In a bowl, mix coconut flour, baking powder, and salt.
2. In another bowl, whisk together eggs, coconut milk, and honey until well combined.
3. Gradually add the dry ingredients to the wet mixture, stirring to avoid lumps.
4. Heat a non-stick skillet over medium heat and lightly grease it.
5. Pour 1/4 cup of batter for each pancake and cook until bubbles form, about 3-4 minutes.
6. Flip and cook for an additional 2-3 minutes until golden.
7. Serve warm with your choice of toppings.
– Allow the batter to rest for a few minutes before cooking for fluffier pancakes.
– You can add vanilla extract for extra flavor!
FAQs:
– Can I substitute with another flour? Coconut flour behaves differently; it’s best used as directed.
– How do I store leftovers? Keep them in the fridge for up to 3 days and reheat before serving.
🍰 Decadent Biscoff Cookie Crust
Elevate your gluten-free baking with this delicious Biscoff cookie crust recipe perfect for all your dessert needs.


3. Quinoa Flour Banana Bread
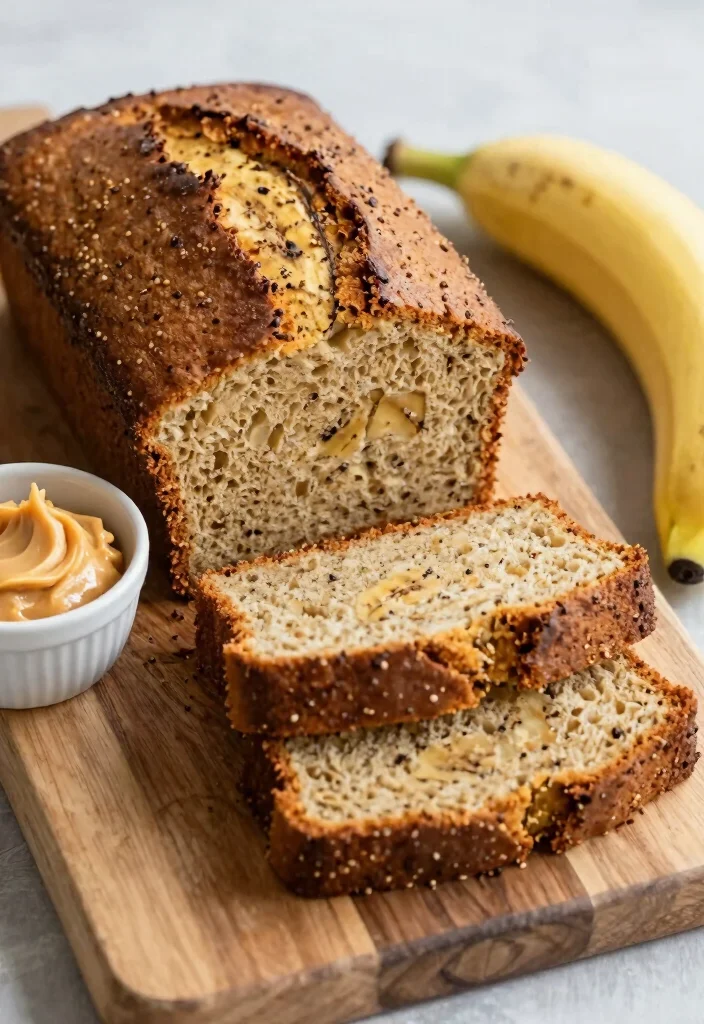
Is there anything better than the smell of freshly baked banana bread? This quinoa flour banana bread is a delightful twist on a classic treat! It’s not only gluten-free but also loaded with protein and fiber, making it a healthier option.
The earthy flavor of quinoa flour perfectly complements the sweetness of ripe bananas, resulting in a moist and satisfying loaf that’s sure to please everyone.
Ingredients:
– 1 1/2 cups quinoa flour
– 1 tsp baking powder
– 1/2 tsp baking soda
– 1/4 tsp salt
– 3 ripe bananas, mashed
– 1/2 cup honey or maple syrup
– 2 eggs
– 1/4 cup coconut oil, melted
Instructions:
1. Preheat your oven to 350°F (175°C) and grease a loaf pan.
2. In a bowl, combine quinoa flour, baking powder, baking soda, and salt.
3. In another bowl, mix mashed bananas, honey, eggs, and melted coconut oil until smooth.
4. Gradually stir in the dry ingredients until just combined.
5. Pour the batter into the prepared loaf pan and smooth the top.
6. Bake for 45-50 minutes, or until a toothpick comes out clean.
7. Let it cool in the pan for 10 minutes before transferring to a wire rack.
– For added flavor, mix in chopped nuts or chocolate chips.
– Serve with a spread of almond butter for a tasty treat!
FAQs:
– Can I use other sweeteners? Yes, feel free to adjust to your taste with different sweeteners.
– How do I know when it’s done? A toothpick inserted in the center should come out clean.


4. Chickpea Flour Flatbreads

Are you looking for a versatile dish that can complement any meal? These chickpea flour flatbreads are a fantastic choice! Gluten-free and rich in protein, they offer a slightly nutty flavor that pairs beautifully with dips, salads, or as a wrap for your favorite fillings.
Simple to make, these flatbreads are a delightful addition to your table, perfect for any occasion.
Ingredients:
– 1 cup chickpea flour
– 1 tsp baking powder
– 1/2 tsp salt
– 1 tsp olive oil
– 3/4 cup water
Instructions:
1. In a bowl, mix chickpea flour, baking powder, and salt.
2. Gradually add water and olive oil, stirring to form a smooth batter.
3. Heat a non-stick skillet over medium heat and lightly grease it.
4. Pour 1/4 cup of batter into the skillet, spreading it into a circle.
5. Cook for 2-3 minutes on each side until golden and cooked through.
6. Repeat with the remaining batter.
7. Serve warm with your favorite dips or toppings.
– Experiment with spices such as cumin or coriander for extra flavor.
– These flatbreads can be stored in the refrigerator and reheated easily.
FAQs:
– Can I use other flours? Chickpea flour gives the best texture for this recipe.
– How do I store them? Keep them wrapped in foil or a sealed container in the fridge.


5. Oat Flour Muffins

Want a quick and delicious breakfast option? These oat flour muffins are your answer! They’re incredibly easy to make, moist, and perfect for on-the-go snacking.
Using oat flour not only adds a wholesome flavor but also keeps these muffins light and fluffy. Customize them with fruits, nuts, or even chocolate chips for an added touch of delight!
Ingredients:
– 2 cups oat flour
– 1 tsp baking powder
– 1/2 tsp baking soda
– 1/4 tsp salt
– 1/2 cup honey or maple syrup
– 1/2 cup milk (dairy or non-dairy)
– 1/4 cup coconut oil, melted
– 2 eggs
Instructions:
1. Preheat your oven to 350°F (175°C) and line a muffin tin with paper liners.
2. In a bowl, mix oat flour, baking powder, baking soda, and salt.
3. In another bowl, whisk together honey, milk, melted coconut oil, and eggs until well combined.
4. Gradually stir the dry ingredients into the wet mixture until just combined.
5. Pour the batter into the prepared muffin tin, filling each cup about 2/3 full.
6. Bake for 15-20 minutes, or until a toothpick comes out clean.
7. Let them cool in the tin for a few minutes before transferring them to a wire rack.
– For added moisture, consider adding a mashed banana or applesauce.
– You can freeze these muffins to enjoy later! Just thaw and reheat.
FAQs:
– Can I mix in fruits? Absolutely! Blueberries or chopped apples work wonderfully in this recipe.
– How do I store them? Keep them in an airtight container at room temperature for up to 3 days.


6. Brown Rice Flour Cookies
Craving something sweet yet health-conscious? These brown rice flour cookies are the perfect solution! They combine a crispy exterior with a chewy center, making each bite delightful.
Gluten-free and easy to prepare, these cookies are an excellent choice for casual baking, satisfying your sweet tooth without the guilt.
Ingredients:
– 1 1/2 cups brown rice flour
– 1/2 tsp baking powder
– 1/4 tsp salt
– 1/2 cup coconut oil, softened
– 1/2 cup brown sugar
– 1 egg
– 1 tsp vanilla extract
– 1/2 cup chocolate chips
Instructions:
1. Preheat your oven to 350°F (175°C) and line a baking sheet with parchment paper.
2. In a bowl, mix together brown rice flour, baking powder, and salt.
3. In another bowl, cream together coconut oil and brown sugar until creamy.
4. Beat in the egg and vanilla extract until combined.
5. Gradually add the dry ingredients to the wet mixture, stirring until just combined.
6. Fold in the chocolate chips.
7. Drop spoonfuls of dough onto the prepared baking sheet.
8. Bake for 10-12 minutes, until the edges are golden.
9. Allow to cool on the baking sheet for a few minutes before transferring to a wire rack.
– Feel free to add nuts or dried fruits for extra texture!
– Store in an airtight container for up to a week.
FAQs:
– Can I use a different sugar? Yes, you can substitute with coconut sugar or a sugar alternative as needed.
– How do I know when they are done? The edges should be slightly firm, but the center might look a tad soft.
Fun fact: Gluten-free brown rice flour cookies bake to a crispy edge and chewy center in just 12 minutes at 350°F. Using brown rice flour with a touch of baking powder keeps textures reliably tasty for any gluten-free baking routine.


7. Sweet Potato Flour Pizza Crust

Is it pizza night at your place? Give your pizza a healthy twist with this sweet potato flour pizza crust! Gluten-free and full of flavor, it offers a subtle sweetness that pairs beautifully with savory toppings.
Whether you’re hosting friends or enjoying a cozy family night, this crust is sure to impress everyone at the table.
Ingredients:
– 1 1/2 cups sweet potato flour
– 1 tsp baking powder
– 1/2 tsp salt
– 1/4 cup olive oil
– 3/4 cup water
Instructions:
1. Preheat your oven to 425°F (220°C) and line a pizza stone or baking sheet with parchment paper.
2. In a bowl, mix sweet potato flour, baking powder, and salt.
3. Add olive oil and water, stirring until a dough forms.
4. Knead the dough briefly on a lightly floured surface until smooth.
5. Roll out the dough into a pizza shape, about 1/4 inch thick.
6. Transfer to the prepared baking sheet and pre-bake for 10 minutes.
7. Add your favorite sauce and toppings, then bake for an additional 15 minutes.
8. Let cool slightly before slicing.
– For a crispier crust, bake a little longer before adding toppings.
– Experiment with different sauces and cheeses for unique flavors!
FAQs:
– Can I use regular flour? This recipe utilizes sweet potato flour for its unique taste and gluten-free properties.
– How do I store leftovers? Keep in an airtight container in the fridge for up to 3 days.


8. Buckwheat Flour Crepes

Craving something versatile for breakfast or dessert? These buckwheat flour crepes are perfect! Gluten-free and rich in nutty flavor, they’re thin and delicate, ready to be filled with your favorite sweet or savory ingredients.
Whether you’re enjoying them for brunch or as a quick dinner option, these crepes are a delightful way to switch up your meal routine.
Ingredients:
– 1 cup buckwheat flour
– 1 1/2 cups milk (dairy or non-dairy)
– 2 eggs
– 1/4 tsp salt
– 1 tbsp olive oil or melted butter
Instructions:
1. In a mixing bowl, whisk together buckwheat flour, milk, eggs, and salt until smooth.
2. Let the batter rest for at least 10 minutes.
3. Heat a non-stick skillet over medium heat and lightly grease it.
4. Pour 1/4 cup of batter into the skillet, swirling to cover the bottom.
5. Cook for 1-2 minutes until the edges lift slightly, then flip and cook for another minute.
6. Repeat with the remaining batter.
7. Fill with your desired fillings and fold or roll them up to serve.
– Add spices or herbs to the batter for extra flavor.
– Serve with a dollop of yogurt or a drizzle of honey for sweetness.
FAQs:
– Can I substitute the milk? Yes, any milk alternative works well in this recipe.
– How do I store them? Keep crepes layered with parchment paper in the fridge to prevent sticking.
Fun fact: Buckwheat crepes can cut prep time by 50% when you whisk everything in one bowl. They’re gluten-free and delicious, a tasty standout in flour and baking powder recipes that prove versatility tastes great.


How To Choose The Right Flour for Your Baking Needs
When you dive into the world of baking, selecting the right flour is one of the most crucial steps. Different flours bring unique flavors, textures, and nutritional benefits to your recipes. Let’s break down how to choose the right flour for your baking adventures.
1. Type of Flour
You first want to decide what type of flour fits your recipe. All-purpose flour is versatile for many baked goods, while whole wheat flour offers a nuttier flavor and higher fiber content. If you’re in gluten-free baking, consider almond, coconut, or chickpea flour as alternatives. Each flour behaves differently, so choose one that aligns with your desired outcome.
2. Protein Content
The protein content of flour plays a significant role in how your baked goods turn out. Higher protein flours, like bread flour, create more gluten and are ideal for bread-making. Lower protein options, such as cake flour, lead to softer, lighter textures. Check the label for protein percentages if you want specific results from your baking.
3. Freshness
Freshness is vital for the best flavor and performance. Flour can go stale or rancid, especially whole grain flours due to their natural oils. Always check the expiration date and store flour in a cool, dark place in an airtight container to maintain its freshness. If possible, buy from a source that sells flour in bulk to ensure you get the freshest option.
4. Gluten-Free Considerations
If you or someone you’re baking for needs gluten-free options, look for certified gluten-free flours. Gluten-free baking can require more care since these flours behave differently than traditional ones. Using a blend of gluten-free flours or adding binding agents like xanthan gum can help achieve the right texture. Experiment with different combinations until you find what works best for you.
5. Flavor Profile
Flour can also impact the flavor of your baked goods. For instance, almond flour gives a subtle nutty taste, while buckwheat flour can add an earthy flavor. Think about how the flour will complement the other ingredients in your recipe. If you’re making something sweet, a sweeter flour like coconut may pair well, while a more robust flour could enhance savory dishes.
6. Availability and Cost
Lastly, consider availability and cost. Specialty flours may not be available in all stores, and prices can vary significantly. If you find a type you love but it’s too pricey, look for alternatives or brands that offer similar qualities at a better price. Sometimes, making a bulk purchase can save money and ensure you always have your favorite flour on hand.
Pro Tip: When trying a new flour, start with small batches to avoid wasting ingredients. This way, you can experiment and see how it affects the outcome of your baked goods without committing to a larger quantity. Enjoy your baking journey!


9. Tapioca Flour Donuts

Who doesn’t love donuts? These tapioca flour donuts are a delightful treat that will satisfy your sweet cravings! Gluten-free and baked, not fried, they have a wonderfully chewy texture that you’ll adore.
Easy to make and customizable with your favorite toppings, these donuts are a perfect guilt-free indulgence for any time of day.
Ingredients:
– 1 1/2 cups tapioca flour
– 1/2 cup almond milk or any milk
– 1/2 cup honey or maple syrup
– 1/4 cup coconut oil, melted
– 1 egg
– 1 tsp baking powder
– 1/2 tsp vanilla extract
Instructions:
1. Preheat your oven to 350°F (175°C) and grease a donut pan.
2. In a bowl, combine tapioca flour and baking powder.
3. In another bowl, whisk together almond milk, honey, melted coconut oil, egg, and vanilla extract until smooth.
4. Mix the dry ingredients into the wet ingredients until well combined.
5. Spoon the batter into the donut pan, filling each cavity about halfway.
6. Bake for 12-15 minutes, or until they look golden brown.
7. Let cool in the pan for a few minutes before transferring to a wire rack.
– Dip in chocolate glaze for an indulgent treat.
– These can be frozen and enjoyed later; just reheat for a few minutes!
FAQs:
– Can I use other sweeteners? Yes, but make sure they are suitable for baking.
– How do I store them? Keep in an airtight container at room temperature for 3 days.


10. Millet Flour Scones

Scones are a delightful addition to any meal, and these millet flour scones are no exception! They’re light, crumbly, and perfect for tea time or breakfast, pairing wonderfully with fruit preserves or clotted cream.
Gluten-free and easy to make, these scones are a lovely treat for cozy gatherings or simply a satisfying snack.
Ingredients:
– 1 1/2 cups millet flour
– 1 tsp baking powder
– 1/4 tsp salt
– 1/4 cup coconut oil, chilled
– 1/2 cup milk (dairy or non-dairy)
– 1/4 cup honey
Instructions:
1. Preheat your oven to 375°F (190°C) and line a baking sheet with parchment paper.
2. In a bowl, combine millet flour, baking powder, and salt.
3. Cut in chilled coconut oil until the mixture resembles coarse crumbs.
4. Stir in milk and honey until a dough forms.
5. Turn the dough onto a floured surface and gently knead.
6. Roll out to about 1 inch thick and cut into triangles.
7. Place on the baking sheet and bake for 15-20 minutes until golden.
8. Serve warm with your favorite spreads.
– Add in dried fruits or nuts for extra texture.
– Best enjoyed fresh, but can be stored for a couple of days.
FAQs:
– Can I use another flour? While millet flour is unique, you could try buckwheat flour as a substitute.
– How do I serve these? They are delightful with jams, honey, or just butter!
Fun fact: millet flour scones can be wonderfully light and crumbly without gluten. With just a dash of baking powder, you transform dairy-free milk into a tender crumb in under 25 minutes. Gluten-free flour and baking powder recipes never tasted so cozy.


11. Hazelnut Flour Brownies
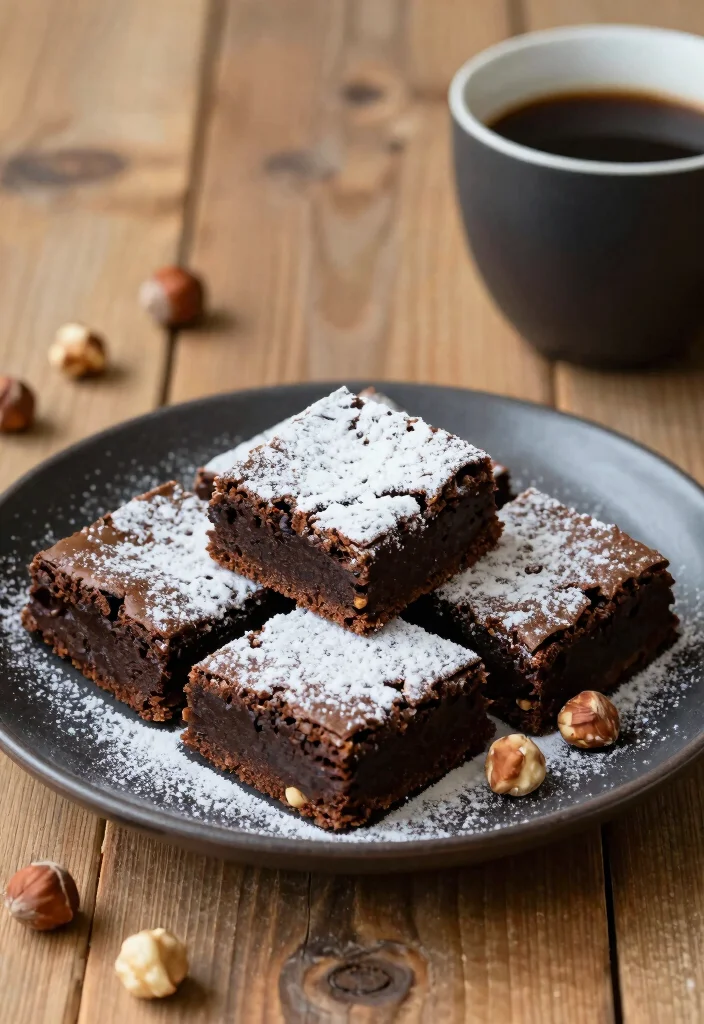
Brownies are a beloved dessert, and these hazelnut flour brownies are a must-try! Rich and fudgy, they are gluten-free and bursting with nutty flavors that complement chocolate beautifully.
These brownies are irresistible and perfect for satisfying any sweet tooth, making them an excellent treat for gatherings or a cozy night in.
Ingredients:
– 1 cup hazelnut flour
– 1/2 cup cocoa powder
– 1/2 tsp baking powder
– 1/4 tsp salt
– 1/2 cup coconut oil, melted
– 1/2 cup honey or maple syrup
– 2 eggs
– 1 tsp vanilla extract
Instructions:
1. Preheat your oven to 350°F (175°C) and grease a baking dish.
2. In a bowl, combine hazelnut flour, cocoa powder, baking powder, and salt.
3. In another bowl, whisk together melted coconut oil, honey, eggs, and vanilla until smooth.
4. Mix the dry ingredients into the wet ingredients until just combined.
5. Pour the batter into the prepared baking dish and smooth the top.
6. Bake for 20-25 minutes or until a toothpick comes out clean.
7. Allow cooling before cutting into squares.
– For extra indulgence, top with a scoop of ice cream.
– You can store them in an airtight container for up to a week.
FAQs:
– Can I use other sweeteners? Yes! Feel free to adjust based on your preferences.
– How do I know they are done? The edges should pull away from the pan slightly, and the center will be set but not dry.


12. Sorghum Flour Biscuits
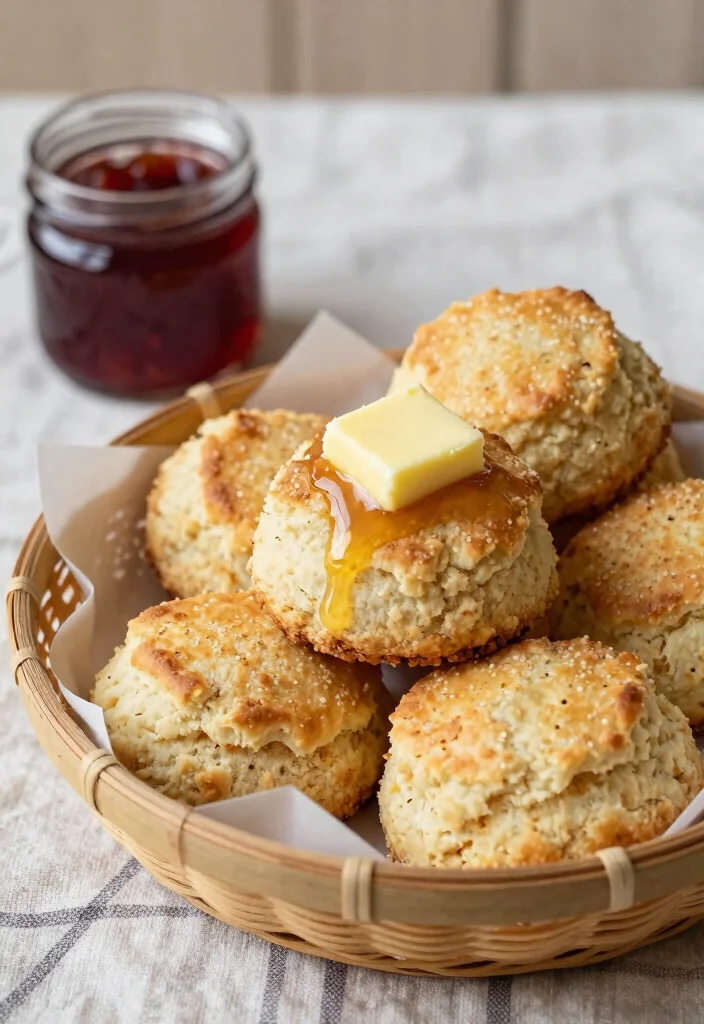
Flaky, buttery biscuits are an ideal side for any meal, and these sorghum flour biscuits fit the bill! Light and fluffy, they pair wonderfully with soups, stews, or even for breakfast with a touch of jam.
Gluten-free and simple to make, these biscuits are sure to impress everyone at the table, making them a delightful addition to any meal.
Ingredients:
– 1 1/2 cups sorghum flour
– 1 tsp baking powder
– 1/2 tsp salt
– 1/4 cup coconut oil, chilled
– 1/2 cup milk (dairy or non-dairy)
Instructions:
1. Preheat your oven to 400°F (200°C) and line a baking sheet with parchment paper.
2. In a bowl, mix together sorghum flour, baking powder, and salt.
3. Cut in chilled coconut oil until the mixture resembles coarse crumbs.
4. Stir in milk until the dough comes together.
5. Turn out onto a floured surface, knead gently, and roll out to about 1-inch thick.
6. Cut into rounds and place on the baking sheet.
7. Bake for 12-15 minutes until golden brown.
8. Serve warm with your favorite spreads!
– For a richer flavor, add herbs like rosemary or thyme to the batter.
– Best when enjoyed fresh! You can freeze them for later enjoyment.
FAQs:
– Can I substitute with another gluten-free flour? You could use a blend of gluten-free flours, but the texture may vary.
– How do I store leftovers? Keep in an airtight container at room temperature.


13. Peanut Flour Energy Bites
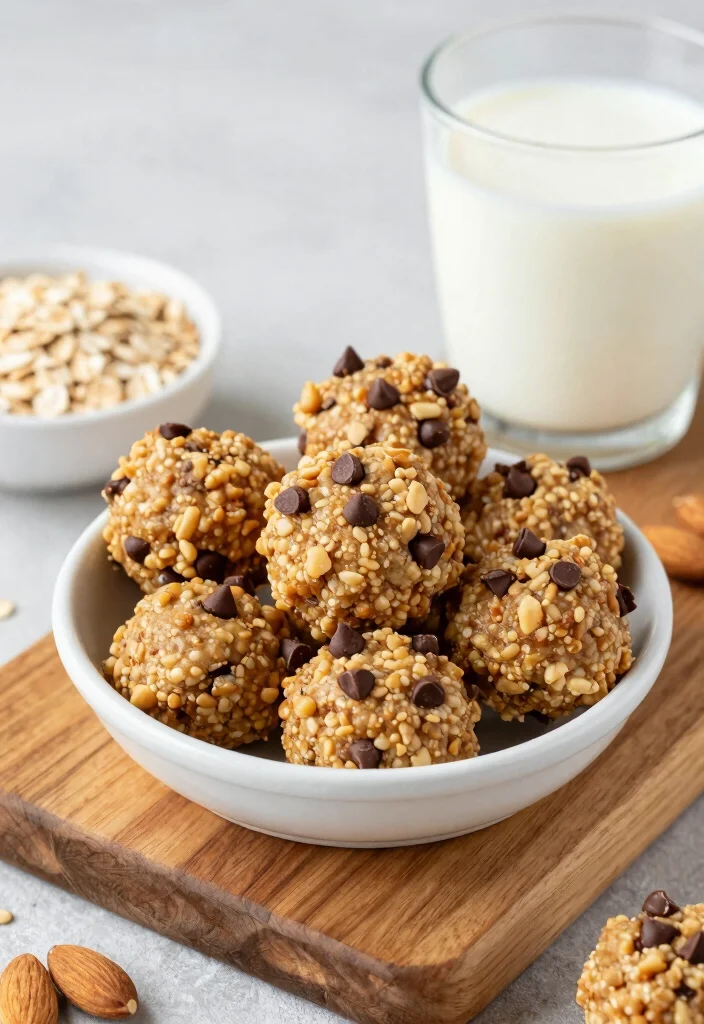
Need a quick energy boost? These peanut flour energy bites are your perfect solution! Packed with protein and flavor, they make for a healthy snack or pre-workout fuel that satisfies your sweet cravings.
Easy to prepare and portable, these bites will keep your energy levels up throughout the day!
Ingredients:
– 1 cup peanut flour
– 1/2 cup oats
– 1/4 cup honey or maple syrup
– 1/2 cup chocolate chips
– 1/4 cup almond milk
Instructions:
1. In a bowl, combine peanut flour and oats.
2. Add honey and mix until combined.
3. Gradually stir in almond milk until it reaches a dough-like consistency.
4. Fold in chocolate chips.
5. Roll the mixture into bite-sized balls.
6. Place on a baking sheet and refrigerate for at least 30 minutes.
7. Enjoy as a quick snack or energy boost!
– For added texture, incorporate chopped nuts or seeds.
– Keep them in the fridge for ready-to-eat snacks.
FAQs:
– Can I use other nut flours? Yes, almond flour or sunflower seed flour would work well too.
– How do I store them? Keep in an airtight container in the fridge for up to a week.


14. Cauliflower Flour Veggie Fritters
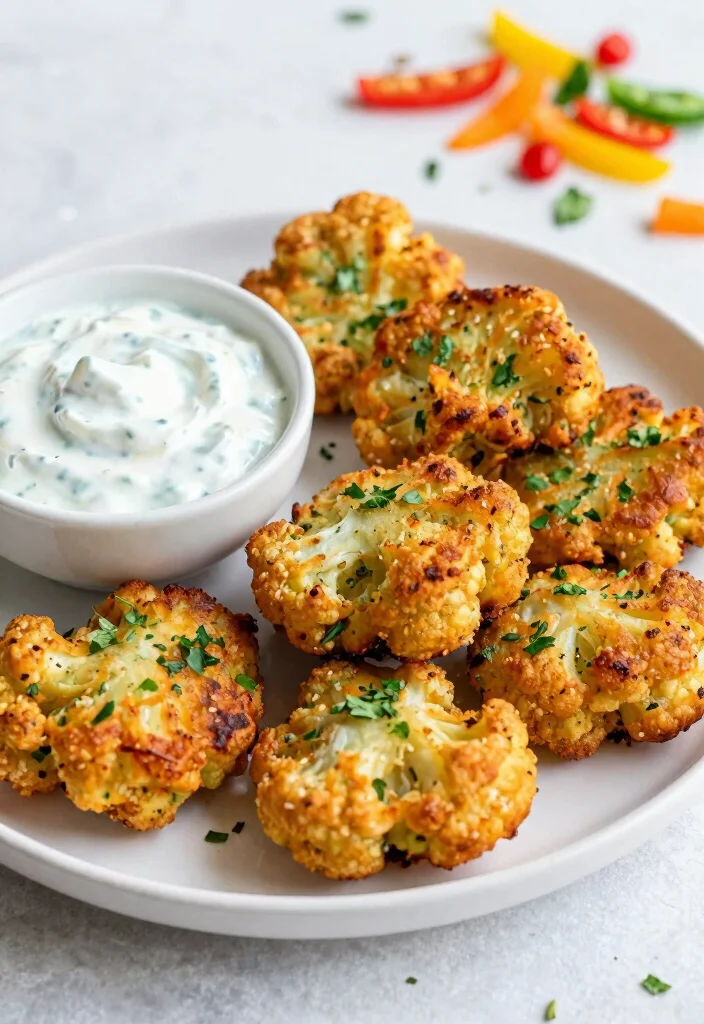
Veggie fritters are a fantastic way to enjoy a nutritious snack! These cauliflower flour veggie fritters are gluten-free and easily customizable with your favorite vegetables. Crispy on the outside and tender on the inside, they’re perfect for snacking or as an appetizer that everyone will love.
Quick to prepare, these fritters are a delicious addition to your meals, adding flavor and nutrition in every bite!
Ingredients:
– 1 cup cauliflower flour
– 1/2 cup grated zucchini
– 1/4 cup grated carrot
– 1 egg
– 1/4 tsp salt
– 1/4 tsp pepper
– 1/4 cup water
Instructions:
1. In a bowl, combine cauliflower flour, grated zucchini, grated carrot, salt, and pepper.
2. Add the egg and mix until well combined.
3. Gradually add water until it forms a thick batter.
4. Heat oil in a skillet over medium heat.
5. Scoop spoonfuls of the mixture into the skillet, flattening them slightly.
6. Cook for 3-4 minutes on each side until golden and crispy.
7. Drain on paper towels and serve warm.
– Try adding herbs or spices for extra flavor.
– Serve with a yogurt dip or salsa for a delightful contrast.
FAQs:
– Can I use other vegetables? Absolutely! Feel free to mix in any veggies you love.
– How do I store leftovers? Keep in an airtight container in the fridge for up to 3 days.


15. Spelt Flour Granola Bars
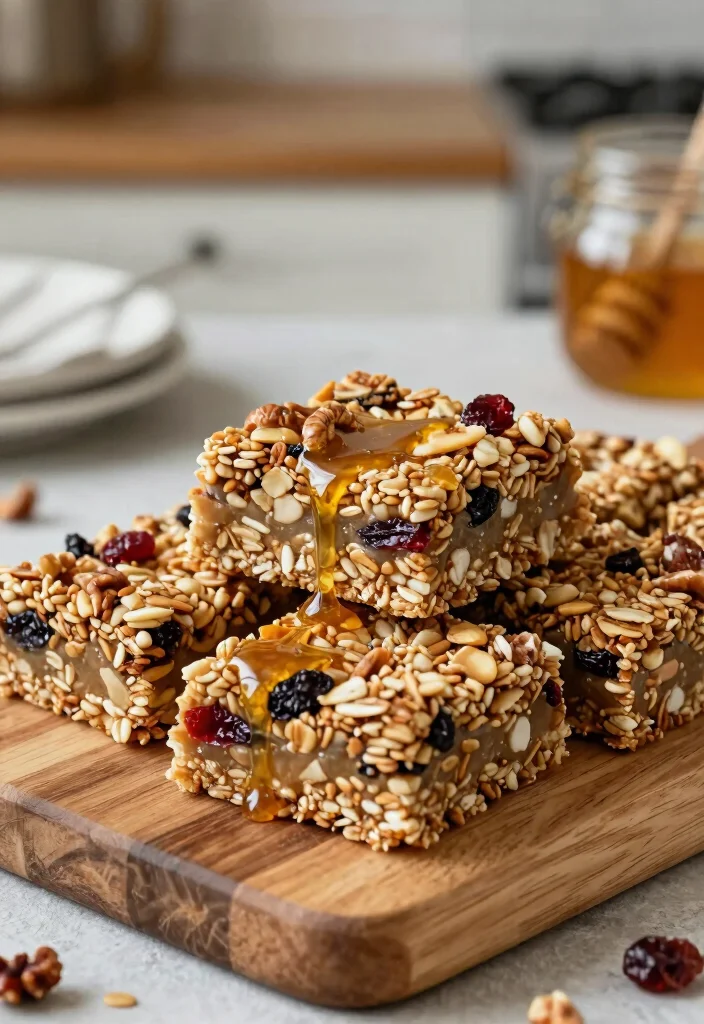
Granola bars are the ultimate grab-and-go snack, and these spelt flour granola bars are both nutritious and delicious! Made with wholesome ingredients, they provide a satisfying balance of energy and flavor, perfect for any time of day.
These bars are easy to customize with your favorite nuts and fruits, making them a delightful treat that you can feel good about indulging in.
Ingredients:
– 1 cup spelt flour
– 1 1/2 cups oats
– 1/4 cup honey or maple syrup
– 1/4 cup coconut oil, melted
– 1/2 cup nuts or seeds (like almonds or sunflower seeds)
– 1/2 cup dried fruit (like cranberries or raisins)
Instructions:
1. Preheat your oven to 350°F (175°C) and line a baking dish with parchment paper.
2. In a bowl, mix spelt flour and oats.
3. In another bowl, combine honey, melted coconut oil, and stir until combined.
4. Mix the wet ingredients into the dry ingredients until well combined.
5. Fold in nuts and dried fruits.
6. Press the mixture firmly into the prepared baking dish.
7. Bake for 20 minutes or until golden brown.
8. Let cool before cutting into bars.
– For added sweetness, drizzle honey on top before baking.
– These can be stored in an airtight container for up to a week!
FAQs:
– Can I use other types of flour? While spelt flour is best for this recipe, you can try others, but it may change the texture.
– How do I store them? Keep in a sealed container at room temperature for up to a week.


16. Flaxseed Meal Flour Bread
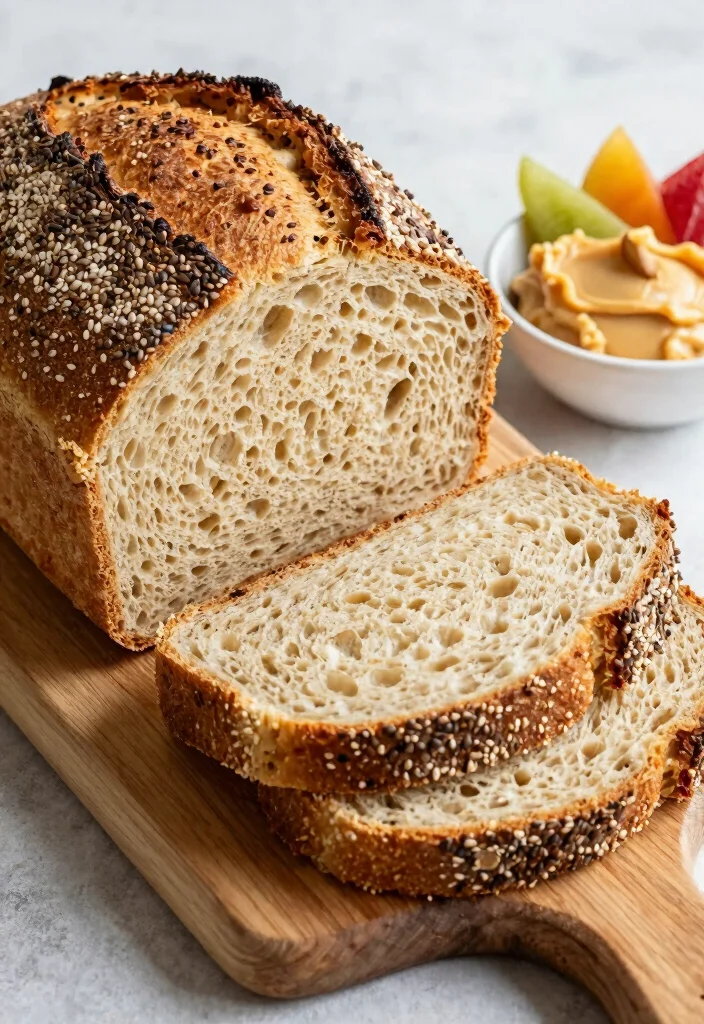
Looking for a nutritious bread option? This flaxseed meal flour bread is a fantastic gluten-free choice! Packed with omega-3 fatty acids, it’s hearty and healthy, with a nutty flavor that adds a unique twist to traditional bread.
Perfect for sandwiches or as a side, this bread is a delightful addition to any meal.
Ingredients:
– 1 1/2 cups flaxseed meal flour
– 1/2 cup almond flour
– 1 tsp baking powder
– 1/4 tsp salt
– 1/2 cup water
– 1 tbsp honey or maple syrup
Instructions:
1. Preheat your oven to 350°F (175°C) and grease a loaf pan.
2. In a bowl, mix flaxseed meal flour, almond flour, baking powder, and salt.
3. Stir in water and honey until a dough forms.
4. Transfer the dough into the prepared loaf pan, smoothing out the top.
5. Bake for 40-45 minutes, or until golden brown and firm to the touch.
6. Allow cooling in the pan for 10 minutes before transferring to a wire rack.
– Serve with avocado or nut butter for a delicious snack.
– This bread can be stored in an airtight container in the fridge or freezer.
FAQs:
– Can I substitute with other flours? Flaxseed meal flour provides a unique texture; other flours may change the outcome.
– How do I know when it’s ready? The exterior should be golden, and it should feel firm.


17. Potato Starch Flour Chocolate Cake

Ready to indulge in a rich dessert? This chocolate cake made from potato starch flour is a decadent way to satisfy your sweet tooth! Incredibly moist and delicious, it’s perfect for birthdays or any special occasion.
Gluten-free and easy to make, this cake will bring joy to chocolate lovers everywhere, especially when topped with a simple frosting or a dusting of powdered sugar.
Ingredients:
– 1 1/2 cups potato starch flour
– 1/2 cup cocoa powder
– 1 tsp baking powder
– 1/4 tsp salt
– 1/2 cup coconut oil, melted
– 1/2 cup honey or maple syrup
– 3 eggs
– 1 tsp vanilla extract
Instructions:
1. Preheat your oven to 350°F (175°C) and grease a cake pan.
2. In a bowl, mix potato starch flour, cocoa powder, baking powder, and salt.
3. In another bowl, whisk together melted coconut oil, honey, eggs, and vanilla until smooth.
4. Gradually combine the dry ingredients with the wet ingredients until well mixed.
5. Pour the batter into the prepared cake pan and smooth the top.
6. Bake for 25-30 minutes or until a toothpick comes out clean.
7. Allow to cool before frosting or serving.
– Top with a rich chocolate ganache for an indulgent dessert.
– This cake can be stored in an airtight container for several days.
FAQs:
– Can I use other sweeteners? Yes, feel free to adapt to your preferences.
– How do I check if it’s done? A toothpick should come out clean from the center.


Conclusion
Baking with alternative flours and baking powder opens up a world of delicious possibilities that everyone can enjoy.
From cookies to pancakes and even decadent cakes, these gluten-free recipes allow for creativity and indulgence without sacrificing taste.
So, grab your apron and start experimenting with these flour and baking powder recipes—your kitchen will be the start of something amazing!
Related Topics