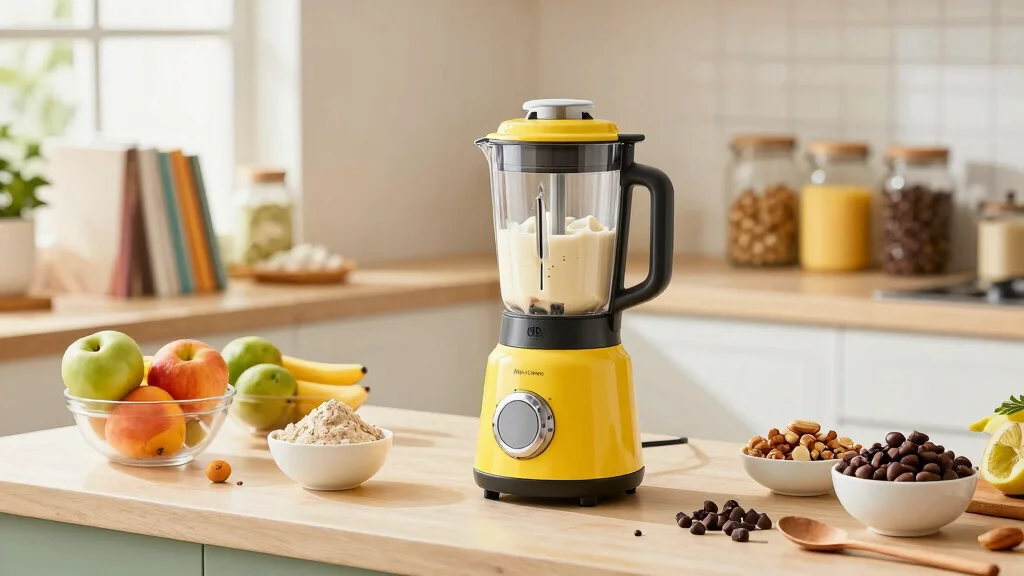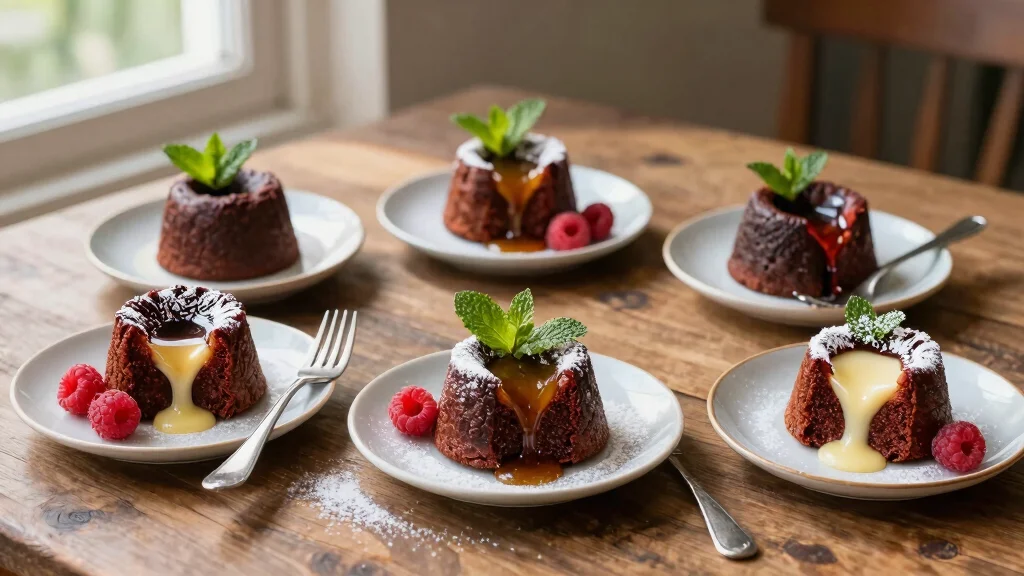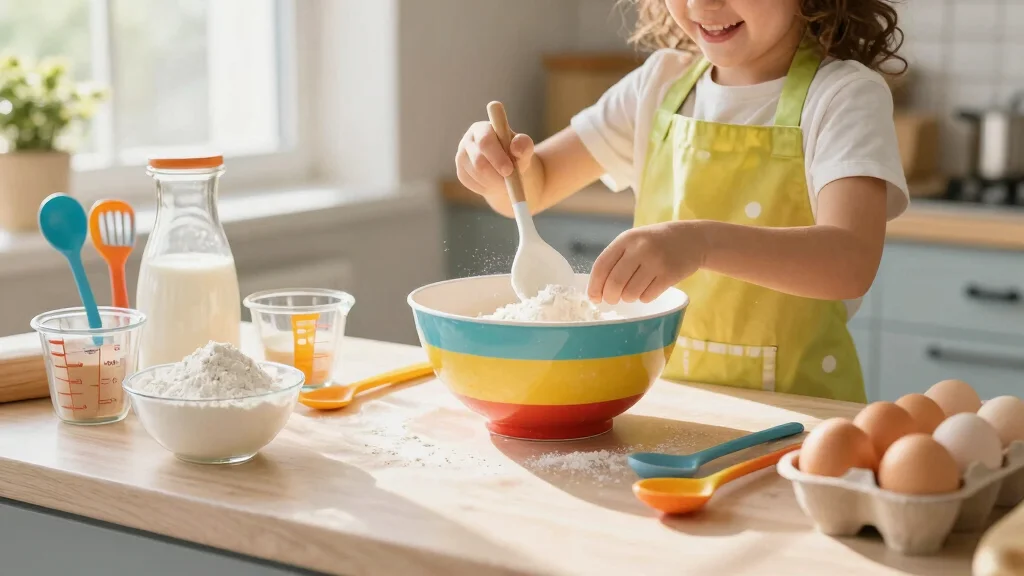

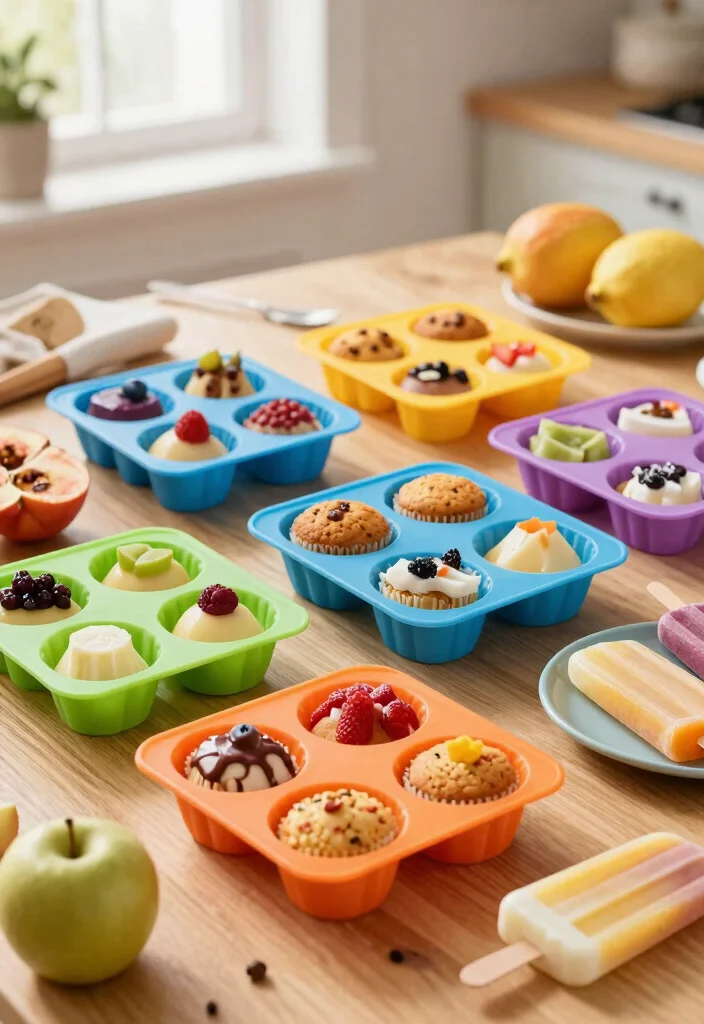
Baking has a magical way of bringing people together, and with the right tools, you can create delightful treats that are both fun and healthy. That’s why I put together this post featuring 18 silicone baking molds recipes that make homemade desserts a breeze. If you’ve been craving something sweet but guilt-free, you’re in the right place! Whether it’s a cozy weekend or a spontaneous gathering, these recipes will satisfy your sweet tooth without the extra calories.
If you love experimenting in the kitchen and enjoy treating yourself and your loved ones, these silicone molds dessert ideas are just for you. You don’t need to be a baking expert to whip up these delicious goodies. From vibrant fruit tarts to creamy mousse, each recipe is designed to be simple and enjoyable. You will discover easy baking recipes that spark your creativity and make you feel like a pro, even if you’re just starting.
Get ready for a wave of inspiration as you dive into this collection of creative dessert molds. With these recipes, you’ll not only impress your friends but also indulge in wholesome, homemade delights that everyone will love. Let’s get baking and transform your kitchen into a dessert wonderland filled with both flavor and fun!
Key Takeaways
– Explore 18 unique silicone baking molds recipes that offer a variety of fun and healthy dessert options.
– Discover easy baking recipes perfect for novice bakers and seasoned pros alike.
– Learn about creative dessert molds that add a playful touch to your treats and make them visually appealing.
– Find practical silicone baking tips to enhance your baking experience and ensure your desserts turn out perfectly.
– Enjoy guilt-free indulgence with homemade treat recipes that prioritize health without sacrificing taste.
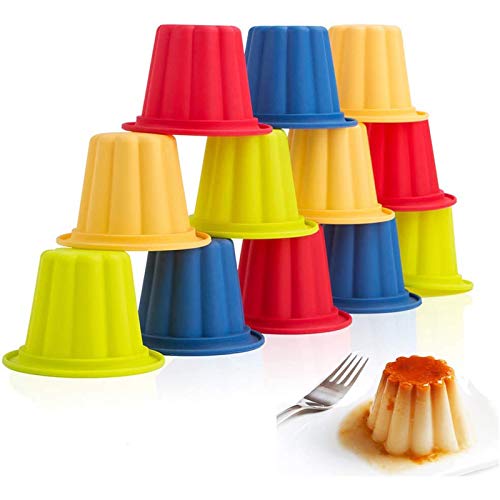
Recommended Products

【Food Grade Safety Silicone Material】The silicone baking mold is made of high-quality food-grade durable silicone which is BPA Free and Eco-Friendly. It is safe used in microwave oven, oven, refrigerator and dishwasher. Temperature safe from -40℉ to 446℉.

【Flexible& Safe Food Grade Silicone】100% food-grade silicone, flexible, long-lasting and non-stick. Heat-resistant temperature -104℉ to 446℉ (-40℃ to 230℃). Safe for use in oven, microwave, dishwasher, fridge, freezer.

Food Grade Muffin Pan: Pan weights: 7.7 oz. Cup diameter top: 2.75 inch, cup depth: 1.1 inch. Regular muffin size is essential baking supplies for the kitchen


1. Berry Coconut Chia Puddings
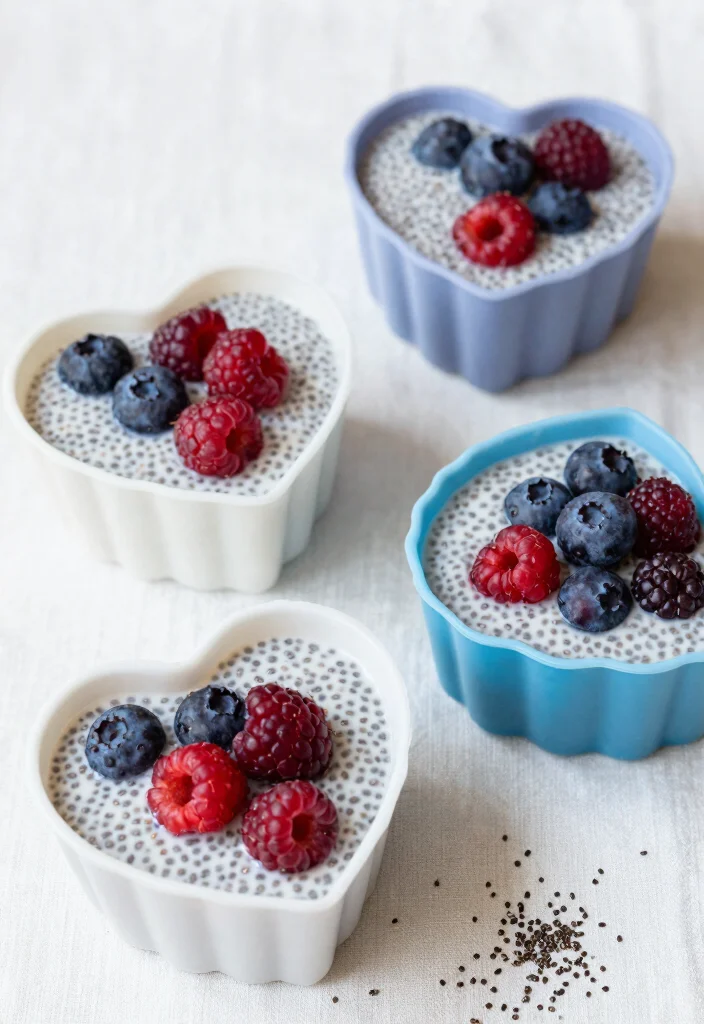
Are you in the mood for something sweet yet nutritious? These Berry Coconut Chia Puddings are not only visually appealing but also packed with flavor and health benefits. Chia seeds offer a rich source of fiber and omega-3 fatty acids, making this dessert a guilt-free indulgence. Layered with vibrant berries and creamy coconut, they are perfect for any time of day, from breakfast to dessert.
Ingredients:
– 1/2 cup chia seeds
– 2 cups coconut milk
– 2 tablespoons honey or maple syrup
– 1 cup mixed berries (strawberries, blueberries, raspberries)
– 1 teaspoon vanilla extract
Instructions:
1. In a bowl, combine chia seeds, coconut milk, honey, and vanilla extract until well mixed.
2. Let the mixture sit for 5 minutes, then stir again to break up any clumps.
3. Pour the mixture into silicone molds and refrigerate for at least 2 hours until set.
4. Once set, top with mixed berries.
FAQs:
– Can I use almond milk instead of coconut milk?
Yes, absolutely! Almond milk works just as well.
Recommended Products

❤ Dimension of Webake small pie tins: 3.2 inch diameter x 0.8 inch depth. Package: You will get 12 mini quiche pans.

【WHAT YOU GET】 Dimension of Webake small pie tins:4*3.3*1.1inches . Package: You will get 8 mini quiche pans.

Widely Use: Zorazio 3Pack Mini Tart Pan Silicone can be used to make fruit tarts, small quiches, small pies, small tarts, mini lemon tarts, small pecan tarts, cheesecakes and more.Perfect for restaurants, bakeries, buffets, weddings, Mother's Day, Valentine's Day, birthday parties, housewarming celebrations and other formal occasions


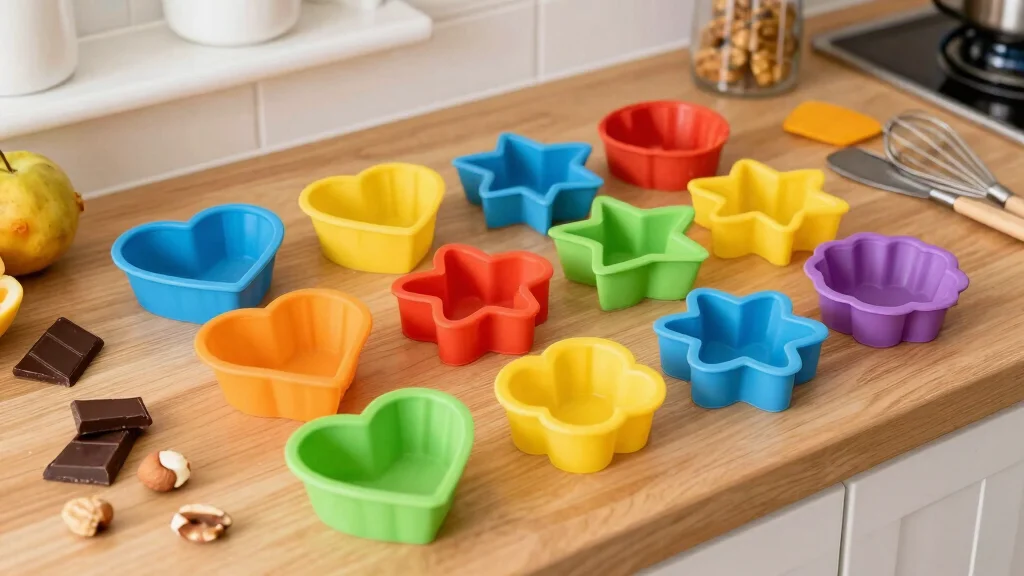
How To Choose Silicone Baking Molds
When you decide to bake fun and healthy desserts using silicone baking molds, it’s essential to choose the right ones. Here are some key factors to consider before making a purchase.
1. Size
Silicone baking molds come in various sizes. Think about the type of desserts you want to make. If you plan to bake mini treats, like muffins or tarts, choose smaller molds. For larger cakes or brownies, opt for bigger ones. Remember to check the measurements to ensure they fit your baking tray.
2. Material Quality
Not all silicone molds are created equal. Look for 100% food-grade silicone, which is safe and durable. High-quality silicone can withstand high temperatures without warping or melting. Check for BPA-free labels to ensure safety as well. A good mold will last for many baking sessions without losing shape.
3. Design and Shape
Silicone molds come in many fun shapes, from traditional round cakes to quirky animal designs. If you want to make unique desserts, pick molds that suit your creativity. Fun shapes can make your treats more appealing, especially for kids! Select designs that inspire you to bake.
4. Ease of Use
Consider how easy the molds are to use. Some molds have a rigid frame that makes them easier to handle. Look for non-stick surfaces, which help your baked goods pop out easily. Check if they are dishwasher safe for easy cleaning. This will save you time and effort in the kitchen.
5. Heat Resistance
Silicone baking molds can handle different temperatures, but their heat resistance can vary. Most quality molds can withstand temperatures from -40°F to 450°F (-40°C to 232°C). Ensure your chosen molds can take the heat for your specific recipes. This way, they won’t crack or warp in the oven.
6. Versatility
Finally, think about how versatile the molds are. Many silicone molds can be used for both baking and freezing. You can use them to make ice cubes, candy, or even soap! If you can find molds that serve multiple purposes, you’ll get more value for your money.
Pro Tip: Always read reviews before purchasing silicone molds. Look for feedback on durability, ease of use, and how well they perform. This can guide you toward high-quality options that work best for your baking needs. Happy baking!
Recommended Products

Premuim Quality: JOERSH round mini cake mold are made of 100% food grade silicone, BPA free, non-toxic, non-stick, heat-resistant and long-last sturdy for more than 1,000 times use (We suggest to put a hard baking tray or sheet under these molds before filling them for easy transfer)

DESIGN: Features 6 cavities with elegant fluted pattern, perfect for creating beautiful raspberry-shaped desserts and decorative elements

VERSATILE DESIGN: You will receive a silicone bubble cube mold, our mold for making living room decor bubble candle making,soap,bubble cake mold for baking dessert mousse cake ice cream


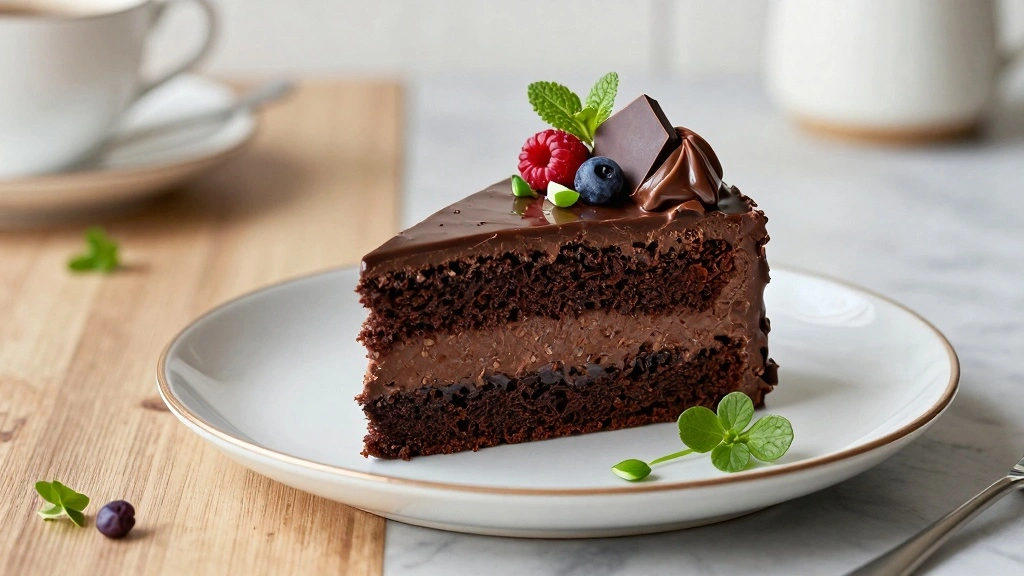
2. Chocolate Avocado Mousse
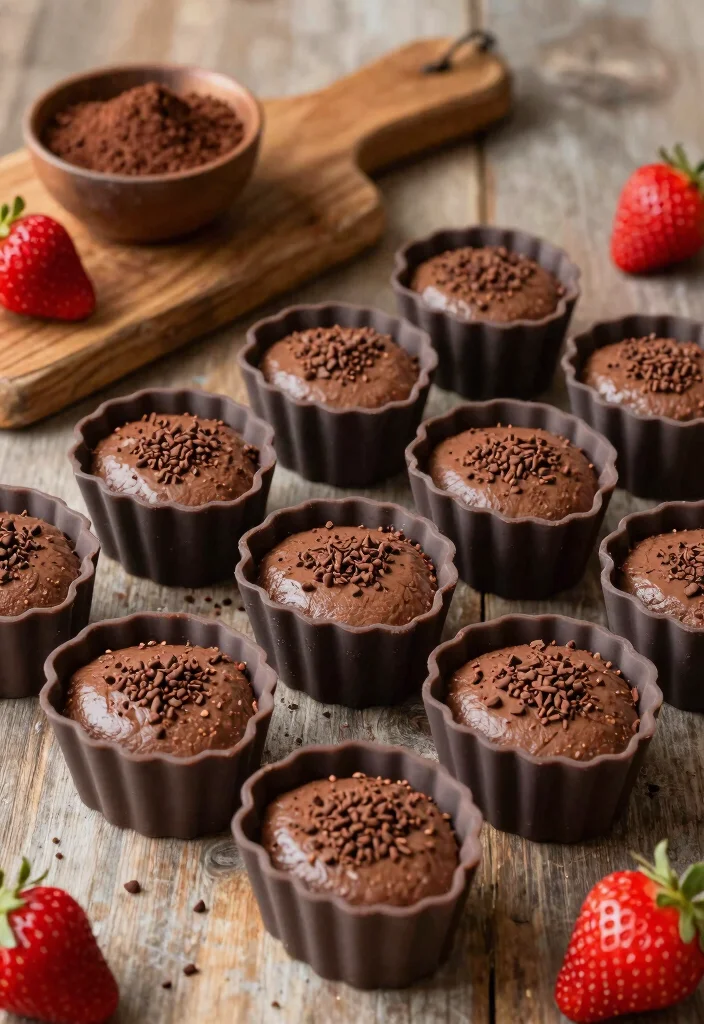
Craving something rich and chocolatey? This Chocolate Avocado Mousse is a creamy dream come true! Made with avocados, it’s a healthier version of traditional mousse that doesn’t skimp on taste. You’ll love how simple it is to prepare, and it’s a delightful treat that won’t weigh you down. Plus, using silicone molds adds a fun twist to the presentation.
Ingredients:
– 2 ripe avocados
– 1/3 cup unsweetened cacao powder
– 1/4 cup maple syrup
– 1 teaspoon vanilla extract
– A pinch of sea salt
Instructions:
1. In a food processor, blend avocados until smooth.
2. Add cacao powder, maple syrup, vanilla extract, and sea salt; blend until fully combined.
3. Spoon the mousse into silicone molds and chill in the fridge for at least 30 minutes.
4. Serve chilled, garnished with fresh berries or cacao nibs.
FAQs:
– Can I use regular cocoa powder instead of cacao?
Yes, though cacao has more nutrients, cocoa powder works fine too.
Recommended Products
VERSATILE DESIGN: Our cheese molds can make desserts, mousse, cake,cheesecake, pastry, chocolate, ice cream

【8-Cavity Silicone Cake Molds】The silicone baking mold measures 11.6×6.8×1.7in, and each cylinder measures 2.3×2.3×1.7in (115 ml capacity). 8-cavity lets you prep multiple treats at once, helping you finish mini cheesecake, cupcakes and small pastries efficiently for daily homemade meals

【 OVEN SAFE & FLEXIBLE SILICONE MOLD 】: LERYKIN silicone molds are made of 100% Food Grade silicone, BPA free, Non-toxic, heat-resistant can withstand temperatures ranging is from -40°F to +446°F (-40℃ to +230℃), it's safe for the oven, microwave oven, freezer, refrigerator & dishwasher.


3. Lemon Poppy Seed Muffins
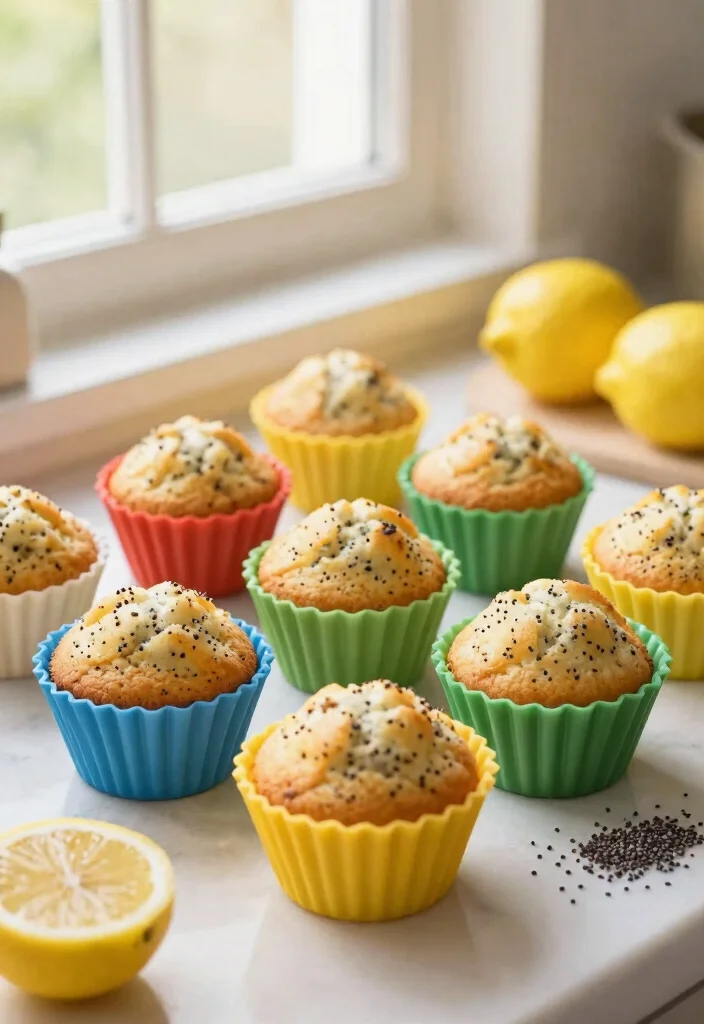
Looking for a bright and zesty treat? These Lemon Poppy Seed Muffins are fluffy, flavorful, and made with wholesome ingredients! With the perfect balance of sweetness and tartness, they are ideal for breakfast or as an afternoon snack. The silicone molds ensure they keep their shape and presentation, making each bite a delight.
Ingredients:
– 1 1/2 cups whole wheat flour
– 1/2 cup honey or maple syrup
– 1/2 cup unsweetened applesauce
– 2 eggs
– 1/4 cup almond milk
– Zest and juice of 2 lemons
– 1 tablespoon poppy seeds
– 1 tablespoon baking powder
– A pinch of salt
Instructions:
1. Preheat the oven to 350°F (175°C).
2. In a large bowl, whisk together flour, baking powder, and salt.
3. In another bowl, mix honey, applesauce, eggs, almond milk, lemon zest, and juice.
4. Combine wet and dry ingredients, folding in the poppy seeds.
5. Spoon the batter into silicone muffin molds and bake for 20 minutes or until golden.
6. Allow to cool before removing from molds.
FAQs:
– Can I make these muffins gluten-free?
Yes, substitute with almond or gluten-free flour!
Fun fact: Silicone baking molds release muffins up to 30% faster to unmold than metal pans. This makes Lemon Poppy Seed Muffins look flawless every time—bright, fluffy, and part of modern silicone baking molds recipes for quick, guilt-free breakfasts.
Recommended Products

1 x Silicone Mini Tart and Pie Mold, the mold measures 12.2'' x 9.8''. Individual hole measures 2''(top diameter) x 1.4''(bottom diameter) x 0.63''(depth), 20 holes in total. Good for home use and commercial use.

1 x Silicone Mini Tart and Pie Mold, the mold measures 12.2'' x 9.8''. Individual hole measures 2''(top diameter) x 1.4''(bottom diameter) x 0.63''(depth), 20 holes in total. Good for home use and commercial use.

Premium Food-Grade Silicone: Crafted from BPA-free, odorless, and non-toxic food-grade silicone, this muffin pan guarantees safe, healthy baking. Its flexible nature ensures effortless release of treats without sticking, simplifying cleanup.


4. Mini Fruit Tarts
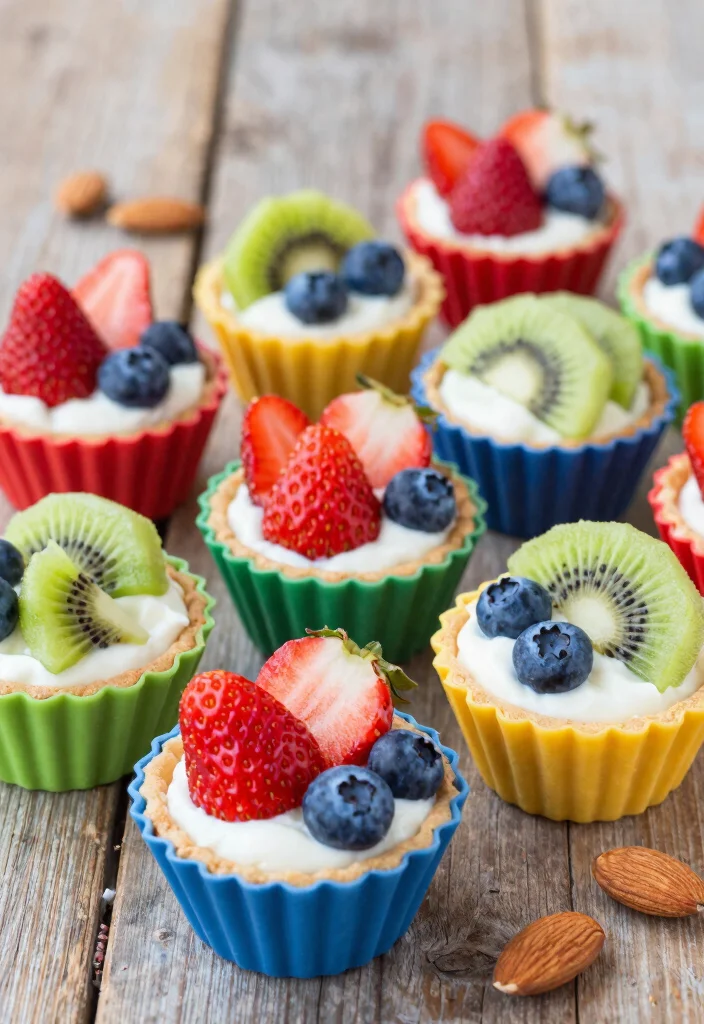
Ready to impress your guests? These Mini Fruit Tarts are colorful, delicious, and fun to make! With a wholesome almond crust and creamy yogurt filling topped with fresh fruits, they are as delightful to eat as they are to look at. Silicone molds help create the perfect petite size, making them great for sharing or enjoying solo.
Ingredients:
– 1 cup almond flour
– 2 tablespoons coconut oil (melted)
– 2 tablespoons honey
– 1 cup Greek yogurt
– Assorted fresh fruits (berries, kiwi, banana)
– 1 teaspoon vanilla extract
– A pinch of salt
Instructions:
1. Preheat the oven to 350°F (175°C).
2. In a bowl, combine almond flour, melted coconut oil, honey, and salt to form a dough.
3. Press the mixture into the silicone molds and bake for 10-15 minutes until lightly golden.
4. Allow to cool, then fill each crust with Greek yogurt mixed with vanilla extract.
5. Top with assorted fresh fruits and refrigerate before serving.
FAQs:
– How long can these tarts be stored?
They are best enjoyed the same day but can be stored in the fridge for 1-2 days.
Recommended Products

[Mini Size Cupcake Baking Cup] The size of our muffin molds are 2 inches (upper diameter), and 0.8 inches (height). It is about the size of half a child's palm and can be used for baking cups for daily desserts, party snacks, donuts, afternoon tea cupcake baking and so on.

Package includes: 2pcs round cylinder silicone chocolate cookie molds with total 24 cups, each cup measures 2.1 x 0.9 inch, this size is a little bigger than ores cookies, so the chocolate can cover all the cookie in the mold
🍰 Decadent Biscoff Cookie Crust
Elevate your guilt-free desserts with this luscious Biscoff Cookie Crust recipe perfect for any silicone baking mold!


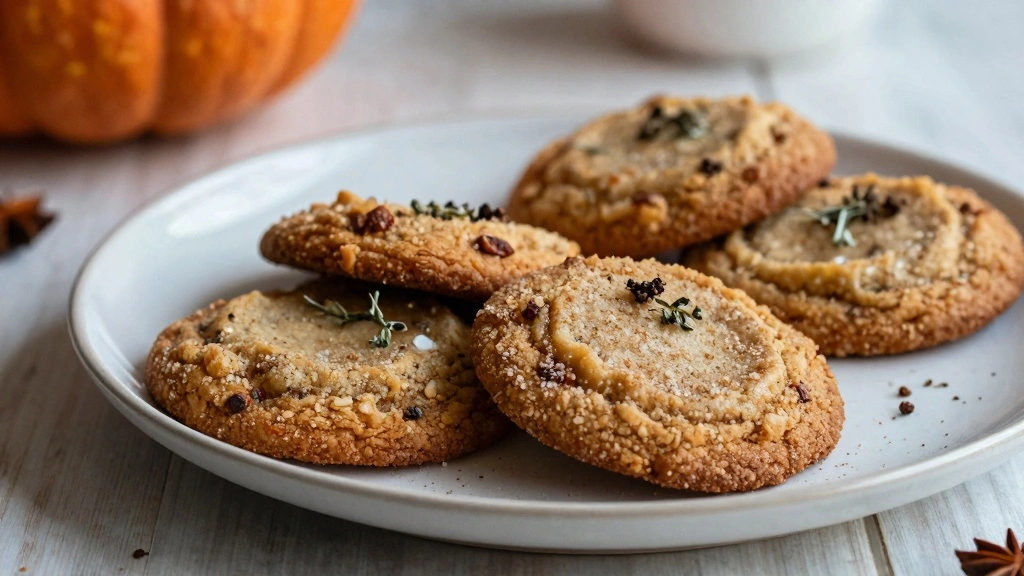
5. Healthy Pumpkin Spice Muffins
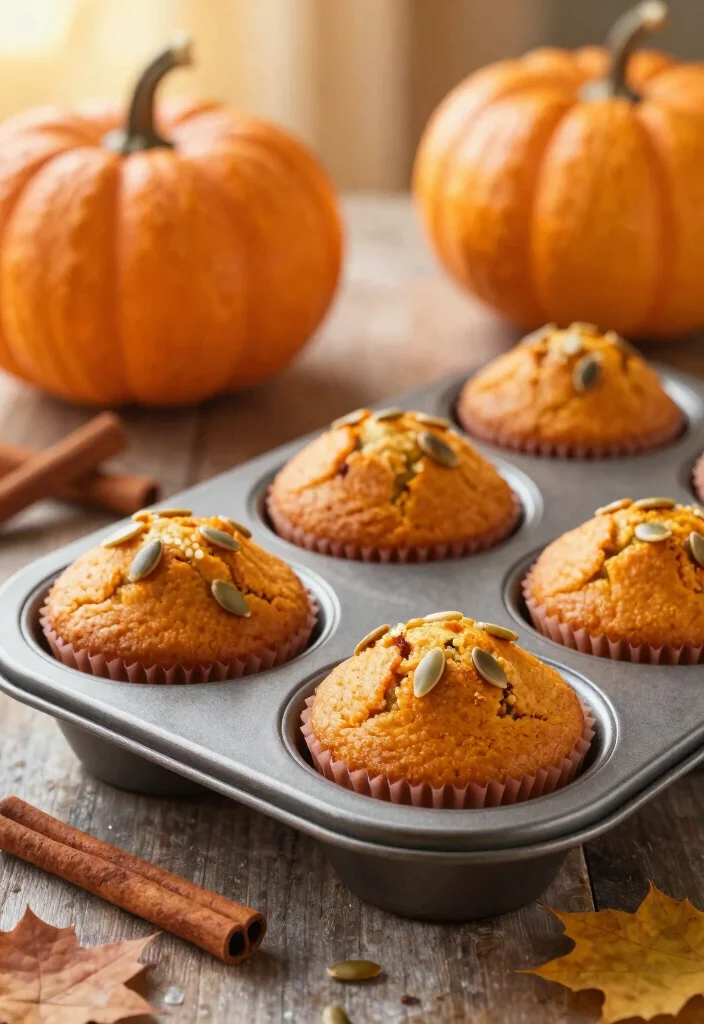
Fall in love with the flavors of autumn! These Healthy Pumpkin Spice Muffins are made with wholesome ingredients and just the right amount of spice, making them perfect for cozy mornings or anytime you crave that warm, inviting flavor. Using silicone molds ensures easy removal and adds a pop of color to your baking!
Ingredients:
– 1 cup whole wheat flour
– 1 cup pumpkin puree
– 1/2 cup honey or maple syrup
– 1/4 cup almond milk
– 2 eggs
– 1 teaspoon baking soda
– 1 teaspoon pumpkin spice
– A pinch of salt
Instructions:
1. Preheat the oven to 350°F (175°C).
2. In a bowl, mix flour, baking soda, pumpkin spice, and salt.
3. In another bowl, combine pumpkin puree, honey, almond milk, and eggs.
4. Stir wet ingredients into dry mixture until just combined.
5. Pour the batter into silicone molds and bake for about 20 minutes.
6. Let cool before removing from molds.
FAQs:
– Can I use canned pumpkin?
Yes, canned pumpkin puree works wonderfully!
Recommended Products

Material: Made of silicone, no peculiar smell, can be in contact with food.

Good Quality: This silicone Peanut Butter Cup mold adopting 100% premium BPA Free silicone material, Non-stick, easy to pop out; ,non-toxic,flexible, reusable and durable. temperature resistant from -40 to 230 degrees Celsius (-40℉to 440℉)

100% PLATINUM SILICONE MOLDS – Made of 100% platinum silicone, LFGB food grade, PINCH TEST passed. Working temperature is -40°F - 446°F. Dishwasher friendly.


6. Almond Butter Chocolate Cups

Indulge in a sweet yet wholesome treat with these Almond Butter Chocolate Cups! A delicious twist on classic peanut butter cups, they feature almond butter for a unique flavor. The silicone molds create perfect shapes, making them easy to serve and enjoy. You can customize the sweetness to your liking, making them as decadent as you desire!
Ingredients:
– 1 cup dark chocolate chips
– 1/2 cup almond butter
– 2 tablespoons honey or maple syrup
– A pinch of sea salt
Instructions:
1. Melt the dark chocolate chips in a microwave-safe bowl.
2. Spoon a small amount of melted chocolate into each silicone mold, tilting to coat the sides.
3. Freeze for 10 minutes until slightly set.
4. Add a dollop of almond butter and top with more melted chocolate.
5. Freeze again for about 30 minutes until fully set.
6. Carefully pop out of the molds and enjoy!
FAQs:
– Can I use milk chocolate instead of dark?
Sure! Use whichever chocolate you prefer.
Recommended Products

Elegant Raspberry Design: The raspberry molds silicone features beautifully detailed raspberry-shaped cavities with an elegant fluted texture that adds a professional touch to your desserts. Perfect for creating eye-catching raspberry mousse cakes, chocolates, and decorative treats that impress guests at any gathering
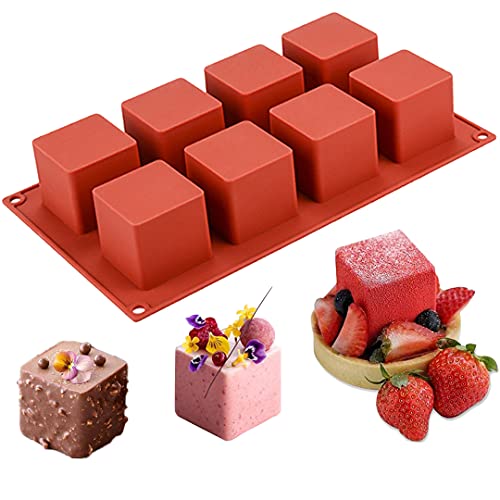
Premium Silicone Molds: The 3D square cube silicone molds is made of professional quality food-grade silicone, BPA free, fexible; Each cavity measures 2" x 2" x 2" (volume 4 fl.oz/120 ml), mini size perfect for your delicate desserts making

ENJOY COOKING - The silicone chocolate mold overall size is 11.69x6.81x1.77inches (LxWxH). Cavity Size: 2.36x2.36x1.77 inches (LxWxH). Each cavity can hold 3.9 oz (115ml). Using multi-cavity silicone cake candy chocolate molds make your cooking easier


7. Nutty Energy Bites
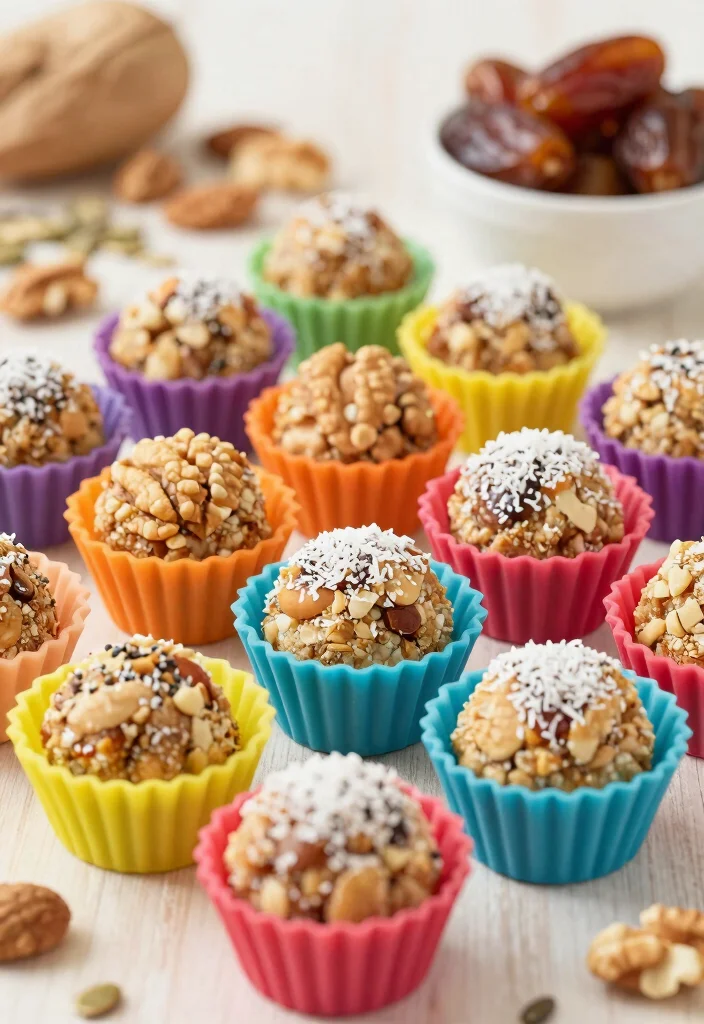
Need a quick energy boost? These Nutty Energy Bites are packed with protein from nuts and seeds, making them a perfect on-the-go snack or post-workout treat. The silicone molds shape them into fun, bite-sized pieces that are nutritious and easy to grab. You’ll love how simple they are to make!
Ingredients:
– 1 cup mixed nuts (almonds, cashews, walnuts)
– 1/2 cup medjool dates (pitted)
– 1/4 cup unsweetened coconut flakes
– 2 tablespoons chia seeds
– 1 tablespoon honey or maple syrup
Instructions:
1. In a food processor, blend the nuts until coarsely chopped.
2. Add the pitted dates, coconut flakes, chia seeds, and honey, and blend until combined.
3. Press the mixture into silicone molds firmly.
4. Freeze for about 20 minutes to set, then pop them out.
5. Store in the fridge for a quick snack!
FAQs:
– How can I make these vegan?
Use maple syrup instead of honey.
Recommended Products
Webake baking cups are made of food grade silicone.


8. Vanilla Yogurt Bark

Looking for a refreshing frozen treat? Vanilla Yogurt Bark is the perfect dessert for hot days! With its creamy yogurt base and colorful fruit toppings, it’s both healthy and visually appealing. Silicone molds help you create delightful shapes that are perfect for sharing or enjoying on your own.
Ingredients:
– 2 cups vanilla yogurt (Greek or regular)
– 1 cup mixed berries (sliced strawberries, blueberries, raspberries)
– 1/4 cup chopped nuts (optional)
Instructions:
1. Line silicone molds with parchment paper if needed.
2. Spread vanilla yogurt evenly in the molds.
3. Top with mixed berries and chopped nuts.
4. Freeze for at least 4 hours or until fully set.
5. Pop out of the molds and break into pieces.
FAQs:
– How long will this keep in the freezer?
It can last for up to one month if stored properly.
Recommended Products

The best molds for homemade fruit snacks: Mini fruit-shaped silicone trays to making mini fruit snacks at home, keep food healthy while saving more money

Webake tart baking pan are made of 100% pure, professional quality food-grade silicone.

【Vibrant 4-Fruit Shapes Set】 Create delightful treats with our charming fruit-shaped molds! This set includes four popular designs: a slice of Watermelon, a plump Strawberry, a half Lemon, and a tropical Pineapple. Perfect for adding a pop of color and fun to any dessert or craft project.


9. Cinnamon Roll Bites
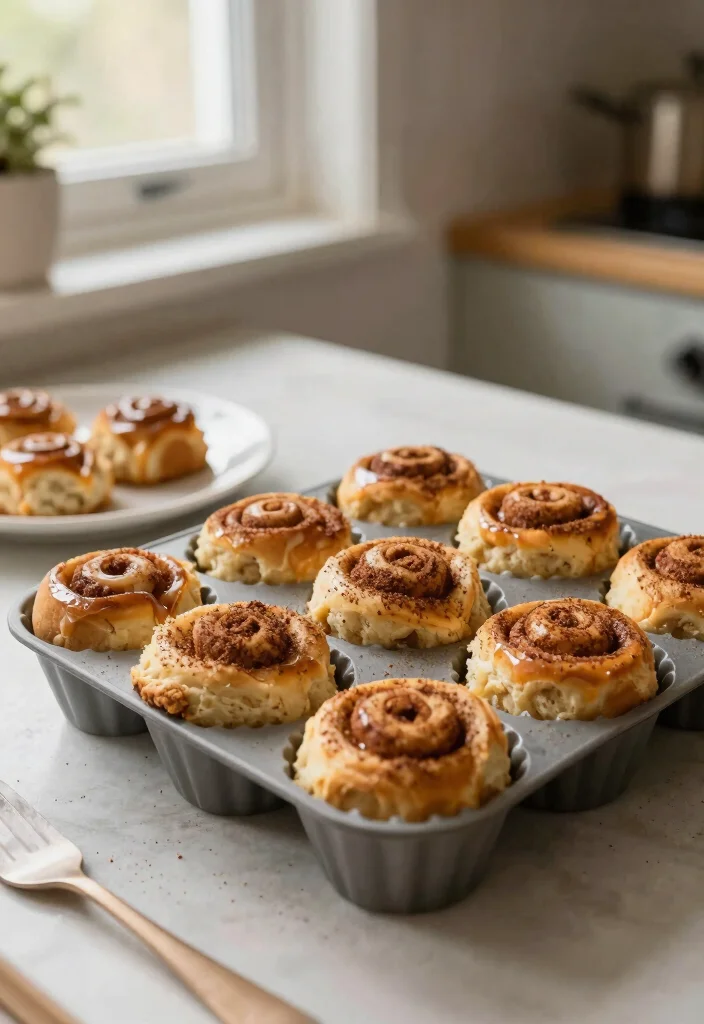
Craving a sweet breakfast treat? These Cinnamon Roll Bites are a delightful way to enjoy a classic! Made with whole grain flour and Greek yogurt, they offer a fluffy texture without the extra guilt. Using silicone molds ensures they come out perfectly shaped and makes cleanup effortless.
Ingredients:
– 1 cup whole wheat flour
– 1/2 cup Greek yogurt
– 1/4 cup honey
– 1 teaspoon baking powder
– 2 teaspoons cinnamon
– 1 tablespoon melted coconut oil
Instructions:
1. Preheat the oven to 350°F (175°C).
2. Combine flour, baking powder, cinnamon, and a pinch of salt in a bowl.
3. Add Greek yogurt, honey, and melted coconut oil, mixing until smooth.
4. Spoon the mixture into silicone molds and shape into small rolls.
5. Bake for 15 minutes until golden brown.
6. Allow to cool slightly before enjoying.
FAQs:
– Can I freeze these?
Yes, they freeze well for quick breakfasts!
Fun fact: Silicone baking molds recipes highlight easy, guilt-free treats like Cinnamon Roll Bites. They cut cleanup time by up to 50% and help you bake with whole wheat flour and Greek yogurt.


10. Raspberry Lemonade Sorbet

On a hot day, nothing beats a refreshing Raspberry Lemonade Sorbet! This treat combines the tangy zest of lemons with the sweetness of ripe raspberries. Using silicone molds lets you create fun shapes that are sure to impress everyone. Plus, it’s easy to make with just a few ingredients!
Ingredients:
– 2 cups fresh raspberries
– 1/2 cup fresh lemon juice
– 1/4 cup honey or agave syrup
– 1 cup water
Instructions:
1. In a blender, combine raspberries, lemon juice, honey, and water until smooth.
2. Pour the mixture into silicone molds.
3. Freeze for at least 2 hours or until firm.
4. Scoop out and enjoy!
FAQs:
– How long will this sorbet last?
It lasts up to a month in the freezer if stored properly.

11. Strawberry Banana Smoothie Pops
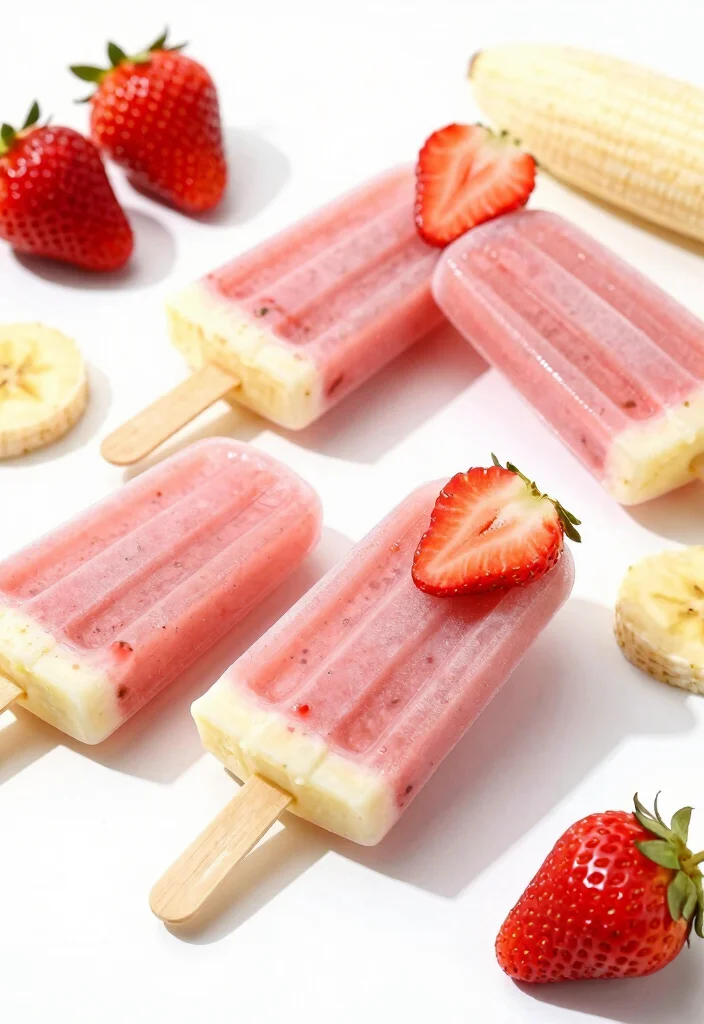
Beat the heat with these delightful Strawberry Banana Smoothie Pops! Loaded with nutrients and bursting with flavor, they are the perfect summertime treat. Silicone molds create these healthy popsicles that are easy to make and fun to enjoy. They’re a hit with both kids and adults!
Ingredients:
– 2 ripe bananas
– 1 cup strawberries (hulled)
– 1 cup yogurt (Greek or non-dairy)
– 1 tablespoon honey or maple syrup (optional)
Instructions:
1. In a blender, combine bananas, strawberries, yogurt, and honey until smooth.
2. Pour the mixture into silicone molds and insert sticks.
3. Freeze for at least 4 hours until set.
4. To release, run under warm water for a few seconds.
FAQs:
– Can I leave out the sweetener?
Absolutely! It depends on your sweetness preference.


12. Honey Almond Granola Bars
Looking for an easy and delicious snack? These Honey Almond Granola Bars are loaded with nuts and seeds, making them a fantastic energy option! Silicone molds help you create perfect bars that are easy to grab on the go. With just a touch of honey for sweetness, they’ll quickly become your favorite snack!
Ingredients:
– 2 cups rolled oats
– 1 cup mixed nuts (almonds, walnuts, cashews)
– 1/2 cup honey
– 1/2 cup almond butter
– 1/4 cup chia seeds
Instructions:
1. Preheat the oven to 350°F (175°C).
2. In a bowl, mix rolled oats, nuts, and chia seeds.
3. In a saucepan, warm honey and almond butter until combined.
4. Pour the wet ingredients into the dry mix and stir well.
5. Press the mixture into silicone molds and bake for 20 minutes.
6. Allow to cool before cutting into bars.
FAQs:
– Can I make these gluten-free?
Yes, just ensure you use gluten-free oats.

13. Chocolate Chip Cookie Dough Bites
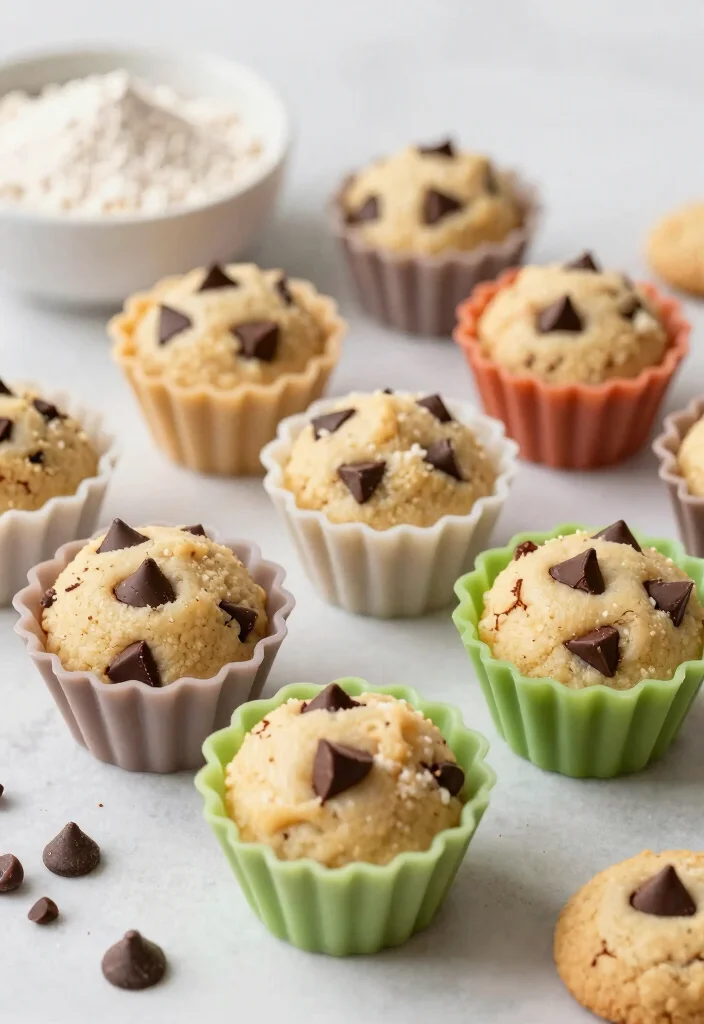
If you love cookie dough, you’ll adore these Chocolate Chip Cookie Dough Bites! This healthier version is egg-free, so you can enjoy it raw without worry. Using silicone molds, you’ll create adorable shapes that satisfy your sweet tooth without the guilt!
Ingredients:
– 1 cup almond flour
– 1/4 cup maple syrup
– 1/4 cup almond butter
– 1/2 cup dark chocolate chips
– 1 teaspoon vanilla extract
Instructions:
1. In a bowl, combine almond flour, maple syrup, almond butter, and vanilla extract until well mixed.
2. Fold in dark chocolate chips.
3. Press the mixture into silicone molds.
4. Chill in the fridge for about 30 minutes before enjoying.
FAQs:
– Can I use peanut butter instead of almond butter?
Yes, that works beautifully!


14. Matcha Green Tea Fudge
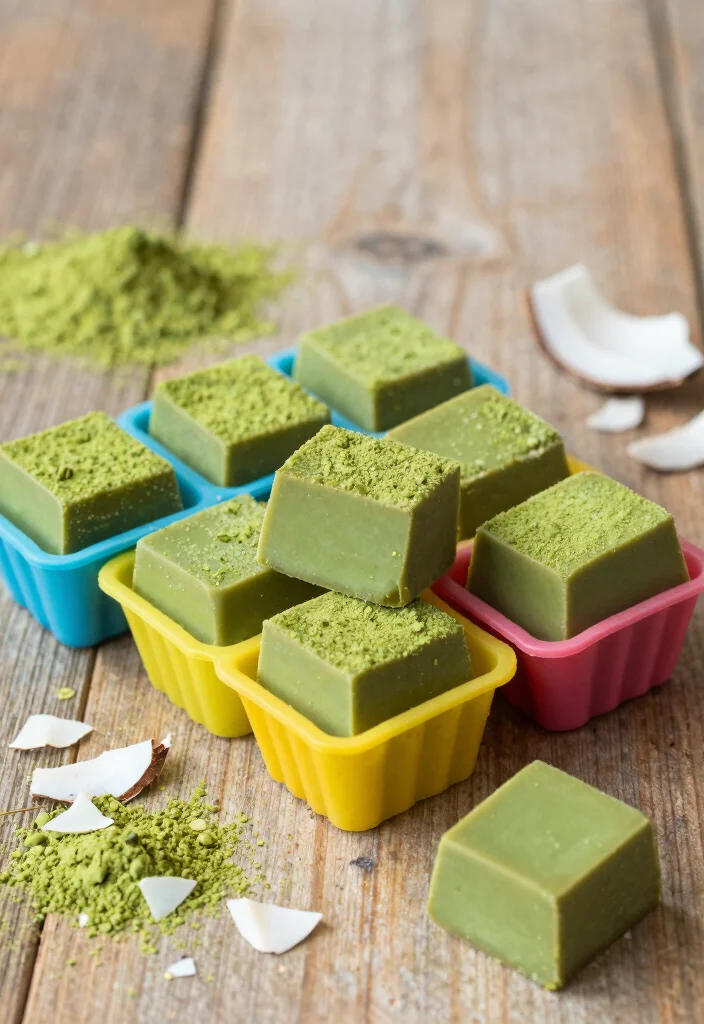
Treat yourself to the unique flavors of Matcha Green Tea Fudge! This healthy dessert is rich, creamy, and packed with antioxidants. The vibrant green color makes it a stunning addition to any dessert table, while silicone molds help you create perfect bite-sized pieces. Enjoy it as a snack or after meals!
Ingredients:
– 1/2 cup coconut milk
– 1/4 cup maple syrup
– 1/4 cup coconut oil
– 1/2 cup almond flour
– 2 tablespoons matcha green tea powder
Instructions:
1. In a bowl, whisk together coconut milk, maple syrup, and coconut oil until smooth.
2. Add almond flour and matcha powder, mixing until fully combined.
3. Pour the mixture into silicone molds and refrigerate for 1 hour until set.
4. Remove from molds and cut into pieces.
FAQs:
– Can I use regular green tea powder?
Matcha is recommended for the best flavor, but regular green tea can work too.
Fun fact: Matcha powder is packed with antioxidants, delivering up to 137 times more catechins than ordinary green tea per serving. Silicone baking molds make perfect bite-sized pieces easy, even for guilt-free desserts. This Matcha Green Tea Fudge proves healthy can taste indulgent.


15. Sweet Potato Brownies
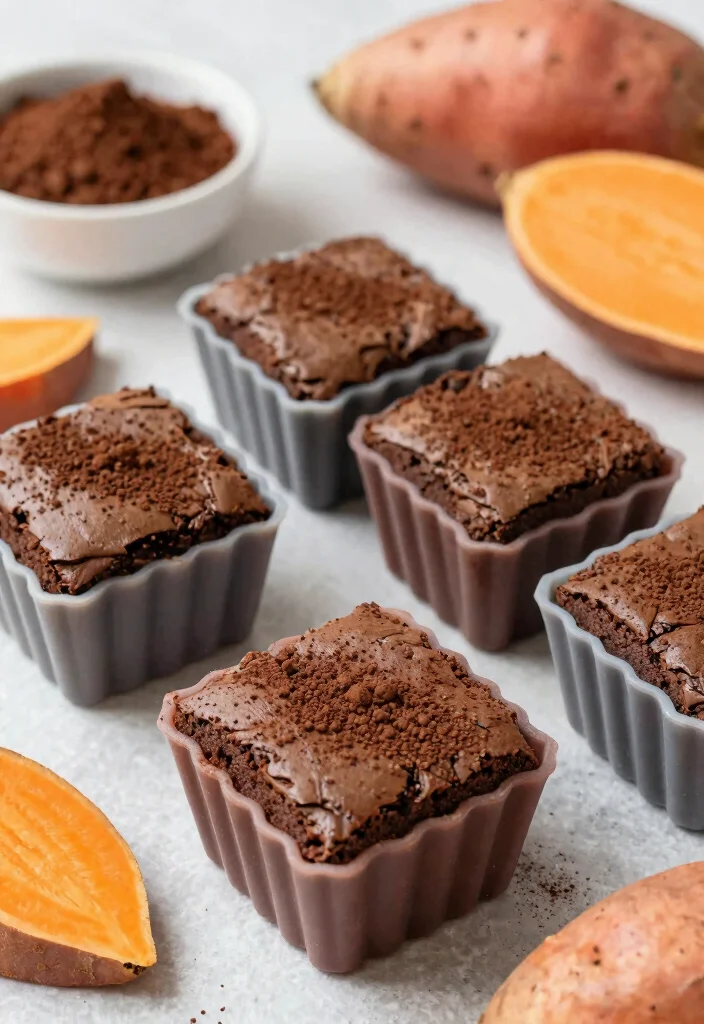
Satisfy your sweet cravings with these delicious Sweet Potato Brownies! Naturally sweetened with mashed sweet potatoes, they offer a healthier alternative to traditional brownies without sacrificing flavor. Using silicone molds helps create perfect squares for a fun twist on this classic treat!
Ingredients:
– 1 cup mashed sweet potatoes (cooked and cooled)
– 1/2 cup almond flour
– 1/2 cup cocoa powder
– 1/4 cup honey or maple syrup
– 1/4 cup almond butter
– 1 teaspoon baking powder
– A pinch of salt
Instructions:
1. Preheat the oven to 350°F (175°C).
2. In a bowl, mix mashed sweet potatoes, almond flour, cocoa powder, honey, almond butter, baking powder, and salt until smooth.
3. Pour the batter into silicone molds and bake for 25 minutes.
4. Allow to cool before removing from molds.
FAQs:
– Can I make these vegan?
Yes, use maple syrup and a plant-based alternative for almond butter.


16. Caramel Apple Cups

Bring the classic flavors of caramel apples into a fun, bite-sized treat with these Caramel Apple Cups! Made with fresh apples and a creamy caramel layer, they are sure to evoke sweet memories. Using silicone molds helps create perfect cups that are bursting with flavor and nostalgia!
Ingredients:
– 2 apples, finely diced
– 1 cup caramel sauce (store-bought or homemade)
– 1 cup Greek yogurt
– 1 teaspoon cinnamon
Instructions:
1. In a mixing bowl, combine diced apples, caramel sauce, and cinnamon.
2. Spoon the mixture into silicone molds, pressing down slightly.
3. Top with Greek yogurt and drizzle additional caramel on top.
4. Chill for at least 1 hour before serving.
FAQs:
– How long will these keep?
They’re best enjoyed within a couple of days!
17. Coconut Macaroons

If you’re a coconut lover, these Coconut Macaroons are a must-try! Chewy on the inside and crispy on the outside, they come together quickly with simple ingredients. Using silicone molds helps you achieve the perfect shape for these delightful bites, making them even more enjoyable to eat!
Ingredients:
– 3 cups shredded coconut (unsweetened)
– 1/2 cup honey or maple syrup
– 2 egg whites
– 1 teaspoon vanilla extract
Instructions:
1. Preheat the oven to 325°F (160°C).
2. In a bowl, mix shredded coconut, honey, egg whites, and vanilla extract until combined.
3. Spoon the mixture into silicone molds and bake for about 15 minutes until golden brown.
4. Allow to cool before removing from molds.
FAQs:
– Can I use sweetened coconut?
Yes, but it will result in a sweeter macaroon.
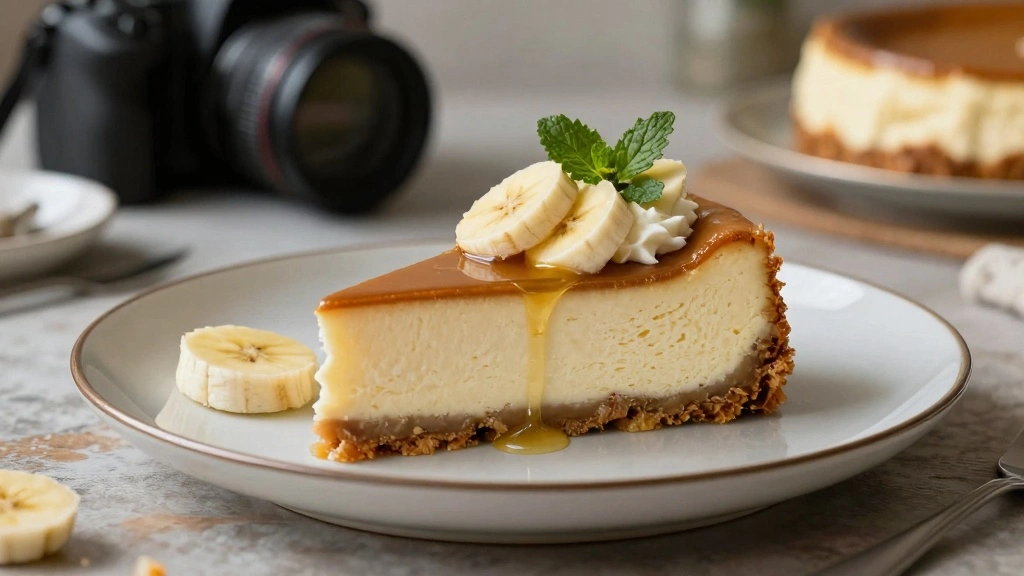
18. Peanut Butter Banana Ice Cream
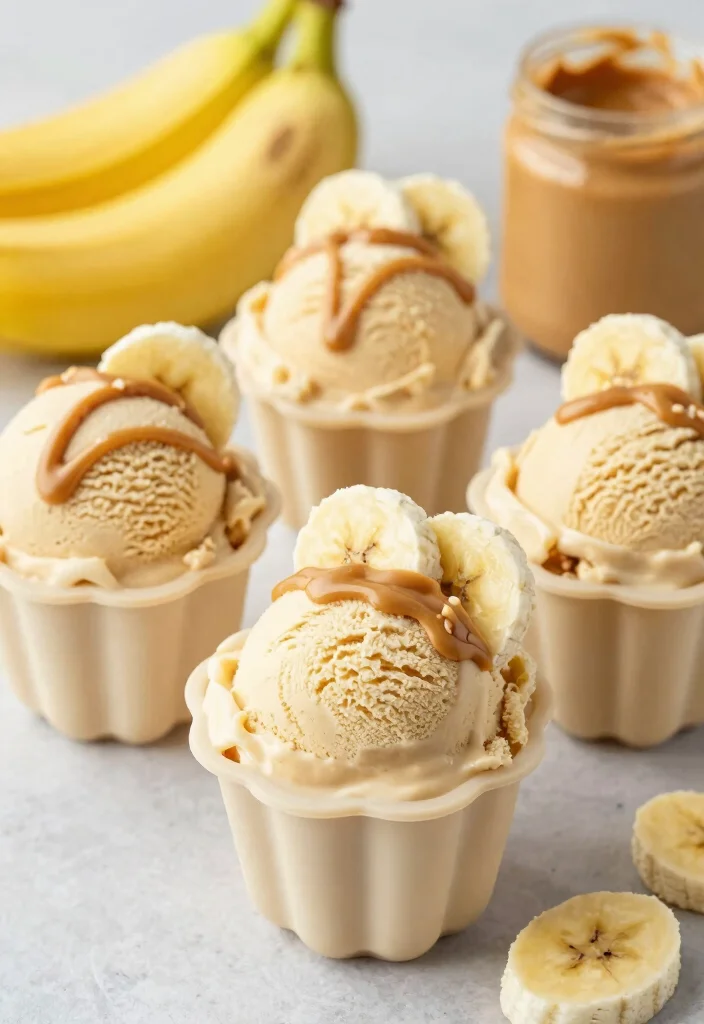
Wrap up your dessert adventure with this creamy Peanut Butter Banana Ice Cream! Made with just two ingredients, it’s incredibly simple to whip up. Silicone molds allow you to create fun shapes, letting you enjoy a refreshing ice cream experience without any guilt!
Ingredients:
– 4 ripe bananas
– 1/4 cup peanut butter
Instructions:
1. Slice the bananas and freeze them for at least 2 hours.
2. Blend the frozen bananas and peanut butter together until smooth.
3. Pour the mixture into silicone molds and freeze for an additional hour.
4. Once set, pop out of the molds and enjoy!
FAQs:
– How long can I store this ice cream?
It can last up to a week in the freezer if tightly sealed.


Conclusion
With these 18 scrumptious silicone baking molds recipes, creating fun homemade desserts has never been easier or healthier. Each recipe offers a unique twist on classics, utilizing wholesome ingredients that don’t sacrifice flavor. Whether you’re looking for a sweet treat for a party or just a little something to satisfy your cravings, these silicone molds will be your go-to kitchen tool. Happy baking and enjoy every last bite!
Related Topics