
Cheesy Taco Sticks are the ultimate fusion of crispy, melty goodness wrapped in a convenient stick form.
Whether you’re looking to spice up a casual weeknight dinner or impress guests at a gathering, these sticks deliver on both flavor and presentation.
The combination of seasoned beef, gooey cheese, and a perfectly crisp exterior makes them irresistible.
I first encountered these delights at a food festival, where their simplicity and taste instantly captivated me.
Ideal for dipping, they pair wonderfully with salsa, guacamole, or sour cream.
Let’s dive into how you can recreate this crowd-pleaser at home.
The History and Cultural Significance
• Cheesy Taco Sticks trace their origins to North America during the late 20th century, where they were inspired by the popularity of tacos and finger foods.
• The dish evolved over decades as convenience foods gained popularity, eventually becoming the beloved version we know today with various fillings and innovative techniques.
• In Mexican-American culture, this dish traditionally appears at casual gatherings and parties, symbolizing communal enjoyment and shared flavors.
• While many variations exist across different regions, the authentic version maintains a crispy exterior with a melty interior that sets it apart from imitations.
Recommended Products

PREMIUM TACO SEASONING: Made with ingredients including onion, garlic, chili pepper, oregano, and cocoa powder, for adding south-of-the-border zip to tacos and your favorite foods.

One ounce of organic taco seasoning blend

Included: One 8 oz pouch of Frontera Original Ground Beef Seasoning Taco Sauce; a mouth-watering sauce that delivers Mexican restaurant-inspired flavors with the convenience of ready made sauces


Recipe Overview
Recommended Products

Delicious Flavor - Enjoy our mozzarella sticks frozen, made with 100% real cheese snacks, providing a satisfying crunchy breading that kids love for brunch, lunch or dinner.

Bulk Value Pack: Includes 25 individually portioned 10 oz frozen pizza dough balls, providing you with plenty of dough for multiple pizza-making sessions, perfect for families, parties, or regular pizza nights at home

Thin crust oven-baked pizza in minutes
Nutritional Information (per serving)
Recommended Products

Delicious: Made with 100% real Mozzarella Cheese, these mozzarella sticks are covered in a delightfully crunchy breading, satisfying crunch, and rich texture make for great frozen appetizers with 12G of protein per serving!

One 12 ct pack of Kraft Natural Mozzarella String Cheese Sticks
KERRYGOLD AGED CHEDDAR CHEESE SNACKS: Signature Kerrygold flavor in a convenient cheese bites format. These cheese snacks deliver a complex yet balanced taste that’s bold, refined, and deeply satisfying


Essential Equipment Guide
Baking Sheet: A high-quality baking sheet ensures even cooking and a crispy exterior. Alternatives like a pizza stone can work, but a baking sheet is most versatile.
Non-Stick Skillet: Important for browning the meat evenly without sticking. Look for one with a heavy base for consistent heat distribution.
Pastry Brush: Essential for applying egg wash to achieve a golden, crispy crust. Silicone brushes are easy to clean and durable.
Recommended Products

SET OF 2 MINI BAKING SHEETS: Comes with 2 mini 9" x 6.2" baking sheets for your favorite toaster oven dishes

Compact crisping tray made of natural aluminum is perforated to promote browning and makes the perfect, crispy pizza crust
![Small Baking Sheet with Rack Set [2 Cookie Sheets + 2 Baking Racks], CEKEE Stainless Steel Small Baking Pan and Grill Rack - Rust & Warp Resistant & Nonstick, Size 9.33 x 6.96 x 1 Inch](https://m.media-amazon.com/images/I/41D93mpOffL._SL500_.jpg)
PERFECT AND COMPLETE SET: CEKEE small baking tray with rack sets are 4 PIECES , which includes 2 small sheet pan: 9.33 x 6.96 x 1 Inch, 2 small wire racks: 8.66×6.29 Inch. This small baking rack with pan is perfect combo, which can help you for baking or cooking favorite food


Ingredients
Recommended Products

Specialty crafted with Daisy Sour Cream

Pure & Natural
Includes one 10-ounce bowl of WHOLLY Guacamole Avo Verde Salsa
For the Base
|
| Amount | Ingredient | Notes |
|---|---|---|
| 1 package | pizza dough | store-bought or homemade |
| 1 cup | shredded cheddar cheese | adds cheesiness |
| 1 cup | shredded mozzarella cheese | provides melty texture |
Filling
| Amount | Ingredient | Notes |
|---|---|---|
| 1 pound | ground beef | cooked and crumbled |
| 1 packet | taco seasoning | adds spice |
| 1 tablespoon | olive oil | for cooking beef |
Finishing
| Amount | Ingredient | Notes |
|---|---|---|
| 1 large | egg | beaten, for egg wash |
| 2 tablespoons | butter | melted, for brushing |


Preparation Methods
Browning Meat: Browning ground beef properly is key for flavor. Heat the skillet before adding beef to ensure it sears rather than steams. Avoid overcrowding the pan.
Rolling Dough: Roll pizza dough evenly to avoid thin spots that can cause leaks. Use light flour dusting to prevent sticking. Practice helps achieve consistency.
Sealing Edges: Properly sealing edges prevents cheese from escaping. Use water to moisten edges before pressing together. A fork can help crimp and seal securely.
Recommended Products

CREATE FLAVORFUL TACOS with spices that celebrate the fun in taking a walk on the mild side.
Includes one 8-ounce package of FRONTERA Ground Beef Taco Skillet Sauce

MILD TACO FLAVOR: Trusted taco flavor with a mild heat made with ingredients like paprika, chili pepper, cumin, and onion for adding south-of-the-border zip to tacos and your favorite foods.


Step 1: Prepare Ingredients
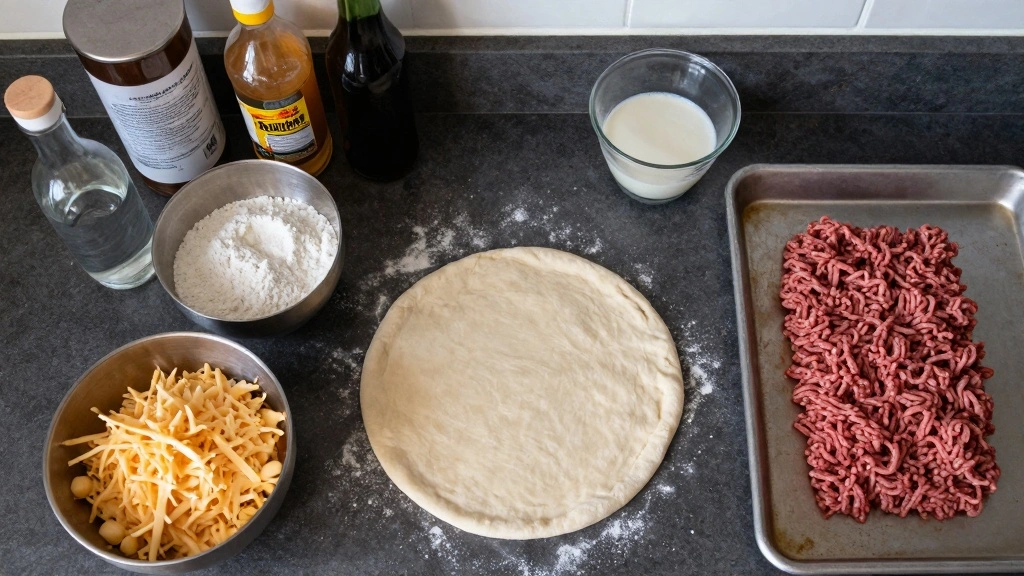
Gather all ingredients and equipment needed for the recipe.
Ensure pizza dough is thawed if frozen.
Preheat oven to 375°F (190°C).
Have a baking sheet ready, lined with parchment paper.
Recommended Products

CRISPY PRETZEL STICKS: Pretz Pizza features a buttery crunch and a bold, cheesy flavor to create the ideal zesty pizza taste

These rolling pines are made of food grade advanced materials, which are healthy, non-toxic and not easily damaged.

Developed in Germany: Our pizza peel is heavy duty sturdy when the 12" long handle is deployed and locked, very compact and neat when folded for storage – a handy cooking or baking accessory that’s easy to store! US Patent (US 11,523,616 B2)


Step 2: Cook the Beef
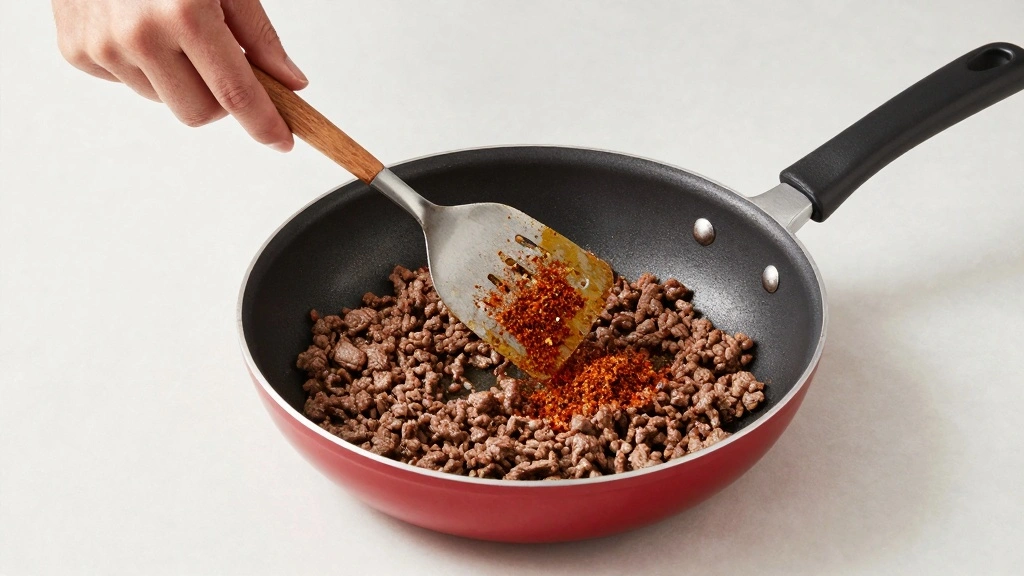
Heat olive oil in a non-stick skillet over medium heat.
Add ground beef and break it apart with a spatula.
Cook until browned and no pink remains, about 5-7 minutes.
Stir in taco seasoning and cook for an additional 2 minutes.
Recommended Products

Package includes 24 individually wrapped 1 oz sticks of Frigo Cheese Heads Original Mozzarella String Cheese (24 oz total)
KERRYGOLD DUBLINER CHEESE SNACKS: Signature Kerrygold flavor in a convenient cheese bites format, featuring 8 individually wrapped sticks. These cheese snacks deliver a complex yet balanced taste that’s bold, refined, and deeply satisfying

Sargento A Promise You Can Taste


Step 3: Prepare the Dough
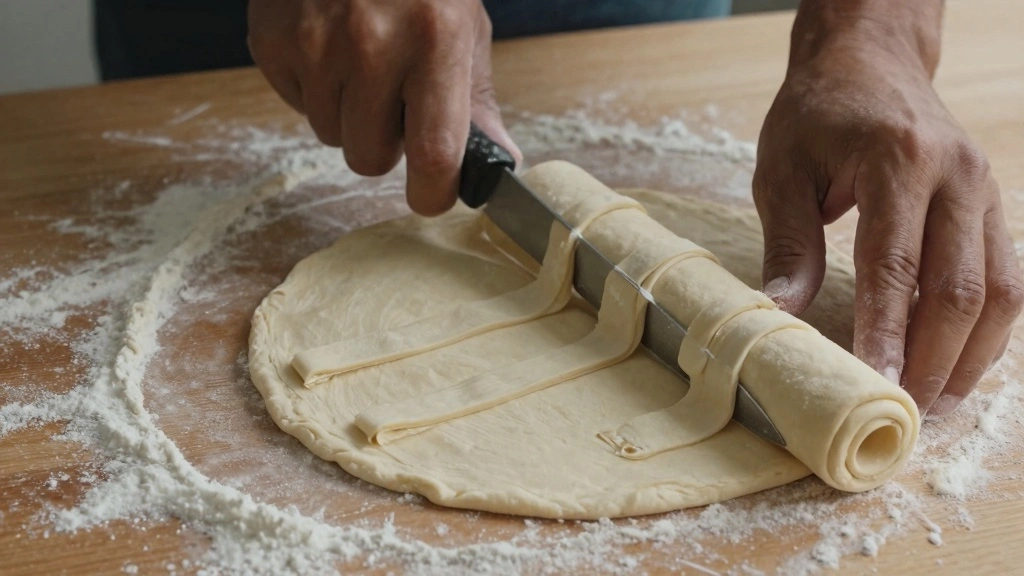
Roll out the pizza dough on a lightly floured surface.
Aim for a rectangle approximately 12x8 inches in size.
Ensure even thickness to avoid thin spots.
Cut dough into 8 equal strips.
Recommended Products

ENHANCED HONEYCOMB TEXTURE: Our baking cookie sheets boast a specialized honeycomb pattern across the surface, which amplifies non-stick performance and enables rapid, consistent heat dispersion throughout each cookie. This innovative design guarantees even baking results, effectively preventing overcooking or undercooking for perfectly golden treats every time.

Ready, Set, Bake: Wilton has the perfect baking sheets for oven set to help you make your favorite foods. Make a layered sheet cake with ease using one baking sheet.
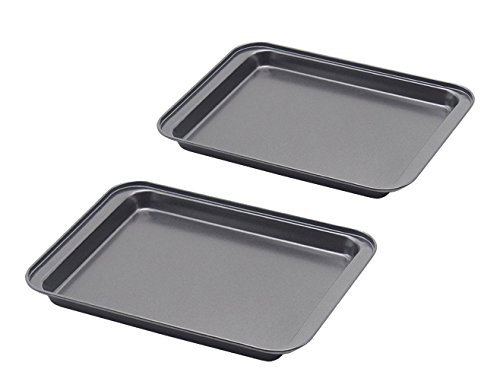
✔LITTLE PANS - Perfect size for a two-person household--frozen rolls, few cookies, etc. Outside SIZE: 9.5inch X 7.1inch X 0.8inch, Actual use inside SIZE:7.5inch X 6inch X 0.5inch. These little pans are great for one person or small items for two.


Step 4: Assemble Taco Sticks
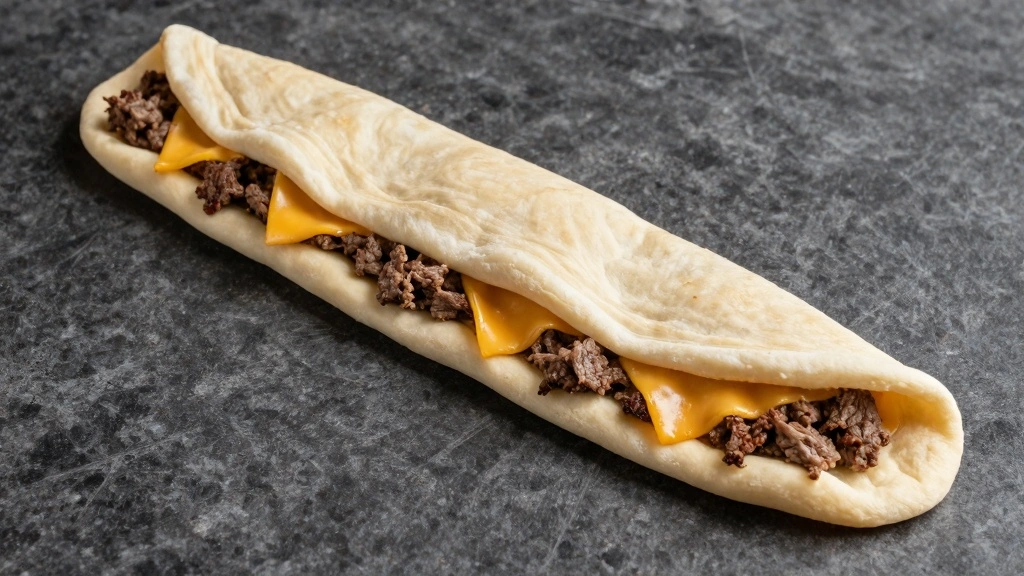
Place a strip of dough on the work surface.
Spoon a small amount of cooked beef along the center of the strip.
Sprinkle a mix of cheddar and mozzarella over the beef.
Fold the dough over the filling and pinch edges to seal.
Recommended Products

Pure & Natural

Creamy mild salsa with fresh-tasting, smooth and spicy flavor. Pair with meat dishes or make it your go-to dip for tortilla chips.
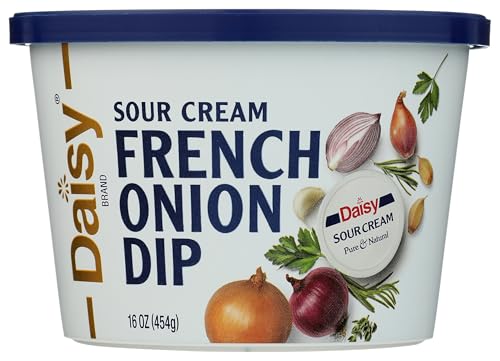
Specially crafted with Daisy Sour Cream


Step 5: Apply Egg Wash
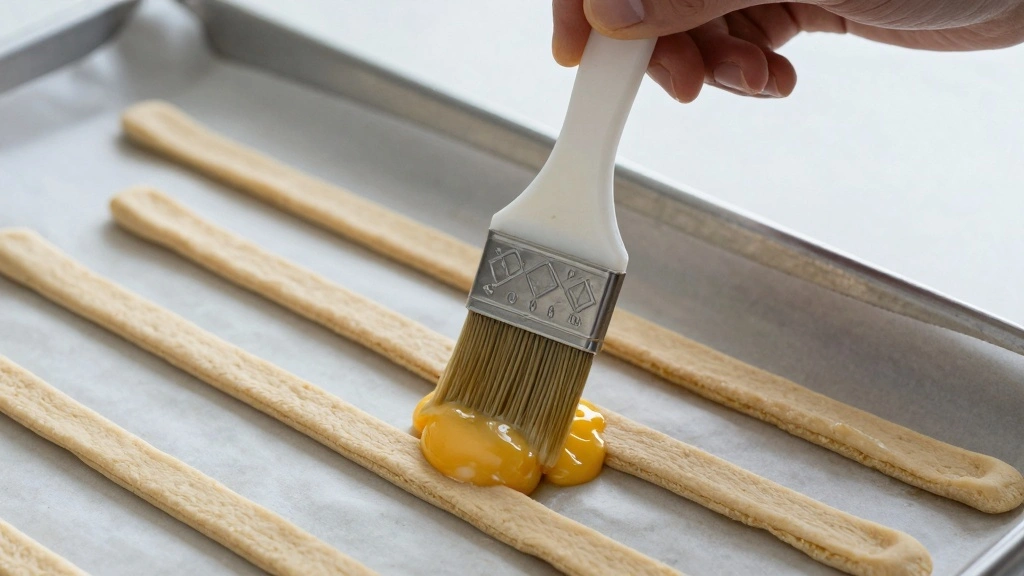
Transfer assembled sticks to the prepared baking sheet.
Brush the tops with beaten egg for a golden finish.
Ensure even coverage for consistent browning.
This step is crucial for a shiny, appetizing appearance.


Step 6: Bake the Sticks
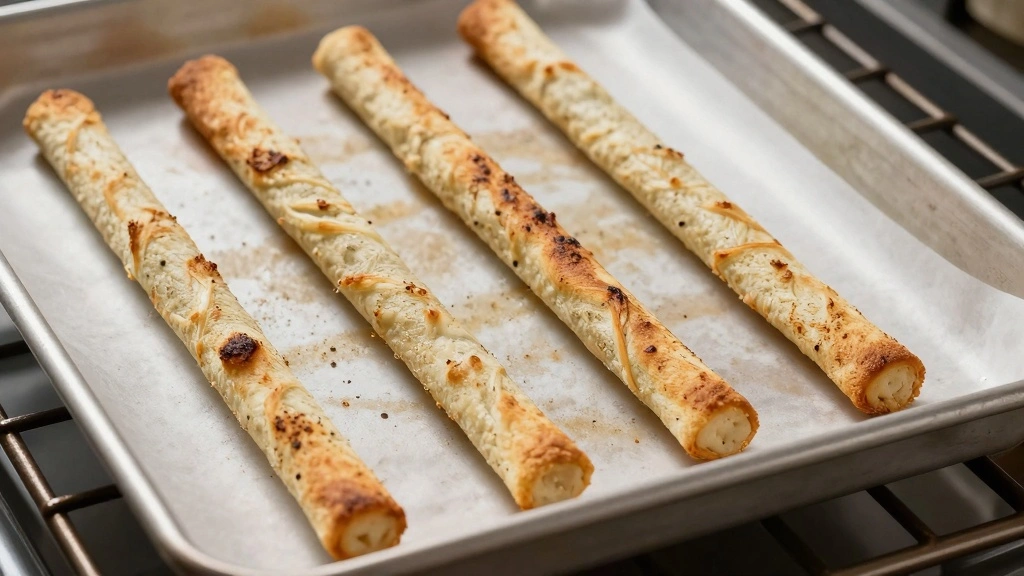
Place the baking sheet in the preheated oven.
Bake for 12-15 minutes or until golden and crispy.
Rotate the sheet halfway through for even baking.
Check for a golden-brown color as an indicator of doneness.

Step 7: Brush with Butter
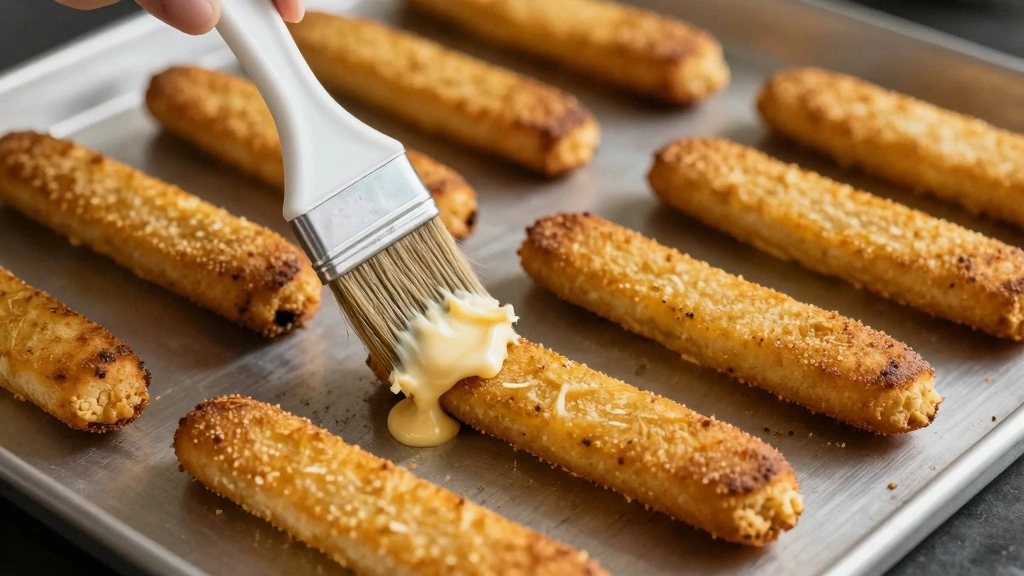
Remove the baking sheet from the oven once sticks are done.
Immediately brush each stick with melted butter for added flavor.
Allow them to cool slightly before serving.
This step enhances both taste and presentation.


Step 8: Serve and Enjoy
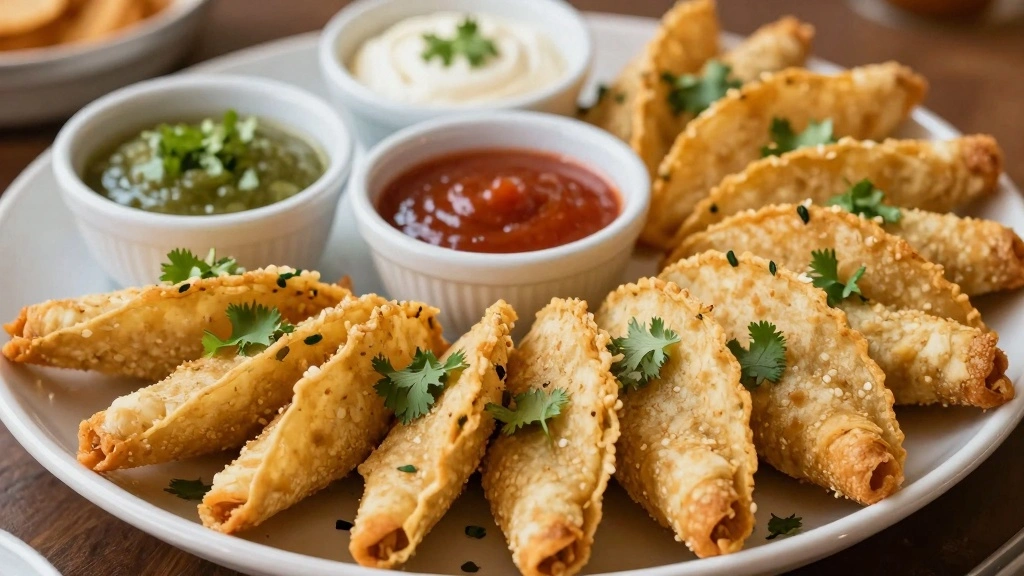
Arrange taco sticks on a serving platter.
Serve with preferred dipping sauces like salsa or guacamole.
Garnish with fresh cilantro if desired.
Enjoy while warm for the best experience.
Critical Timing and Temperature Guide
Browning the Beef: Cook over medium heat until no pink remains. Avoid high heat that can lead to burning or uneven cooking.
Baking the Sticks: Bake at 375°F (190°C) for 12-15 minutes. Look for golden-brown color as a sign of doneness. Avoid underbaking which leads to doughy centers.
Applying Egg Wash: Ensure egg is evenly beaten and applied uniformly. Uneven application can lead to patchy browning.

Pro Tips for Cheesy Taco Sticks
• Ingredient Selection: Use fresh, high-quality cheese for the best melt and flavor, and opt for lean ground beef to avoid excessive grease.
• Preparation Secret: Allow the dough to rest at room temperature before rolling to make it more pliable and easier to shape.
• Temperature Management: Keep cheese cold until assembly to prevent premature melting during preparation.
• Texture Enhancement: Ensure the beef is crumbled finely to promote even distribution inside the sticks.
• Flavor Layering: Use a combination of cheddar and mozzarella to balance sharpness and meltability.
• Make-Ahead Strategies: Assemble sticks in advance, freeze, and bake directly from frozen, adjusting bake time.
• Restaurant-Quality Finishing Touches: Sprinkle coarse salt or sesame seeds on top before baking for added texture.
• Equipment Optimization: Preheat the baking sheet in the oven to jumpstart crisping of the dough.


Troubleshooting Common Issues
• Leaking Cheese: Ensure edges are sealed tightly to prevent cheese from escaping during baking.
• Dough Tears: Roll dough evenly and avoid overstretching to prevent tearing.
• Undercooked Centers: Check oven calibration if centers remain doughy, and consider increasing baking time slightly.
• Burned Edges: Rotate baking sheet during cooking to promote even baking and prevent over-browning.
• Dry Beef Filling: Cook beef with a small amount of water or broth to retain moisture and prevent dryness.
• Pale Crust: Ensure egg wash is applied evenly for proper browning and shine.
Variations and Regional Differences
• Spicy Variation: Add chopped jalapenos or hot sauce to the beef for a spicier kick.
• Vegetarian Version: Substitute beef with seasoned black beans and corn for a vegetarian-friendly option.
• Southwestern Style: Incorporate bell peppers and onions into the filling for a Southwestern twist.
• Tex-Mex Influence: Use pepper jack cheese and add chili powder for a Tex-Mex flair.
Food Science Behind the Recipe
• Maillard Reaction: The browning of the dough and beef enhances flavor through the Maillard reaction, a chemical reaction between amino acids and reducing sugars.
• Emulsification: The combination of cheese types helps create a smooth, melty texture due to emulsification.
• Heat Transfer: Even heat distribution is crucial for baking, which is why preheating the oven and using a quality baking sheet matter.


Frequently Asked Questions
What's the most common mistake people make when preparing Cheesy Taco Sticks? Overfilling the dough can lead to tears and leaks, so it's crucial to balance filling and space.
Can I make these ahead of time? Yes, you can assemble and freeze them, then bake directly from frozen, extending the bake time by a few minutes.
What dipping sauces pair best with these sticks? Salsa, guacamole, and sour cream are classic choices that complement the flavors well.
How do I store leftovers? Store in an airtight container in the fridge for up to 3 days, and reheat in the oven for best results.
Can I use a different type of dough? Yes, crescent roll dough works well as an alternative for a slightly different texture.
Why is my dough not browning? Ensure the oven is properly preheated and the egg wash is applied evenly.
What can I do if my sticks are coming out soggy? Ensure baking sheet is preheated and avoid overcrowding, which can trap steam.
Serving and Presentation Guide
• Traditional Presentation: Serve on a large platter with dipping sauces in small bowls around the perimeter.
• Casual Style: Serve in a basket lined with parchment paper for a laid-back, fun presentation.
• Gourmet Touch: Arrange on a wooden board with fresh herbs and a variety of dips for a sophisticated look.
• Party Platter: Include additional finger foods like taquitos and jalapeno poppers for a diverse appetizer spread.


Conclusion
Cheesy Taco Sticks offer a delightful blend of textures and flavors that are sure to please any crowd.
With straightforward preparation and versatile serving options, they're perfect for any occasion.
Try this recipe and experience the joy of a crispy, cheesy bite.
Your taste buds will thank you!